TEAM SOLUTIONS
 WORKFLOW SOLUTIONS



 REVIEW TOOL
 PROJECT MANAGEMENT
 TOOLS & INTEGRATIONS
 CLIENT INTERVIEWS




Last updated: September 2026
It’s late at night, the launch is in a few days, and you have more work to do than ever. Suddenly you get a notification with a weird link… But it’s from a colleague, so it’s probably alright? At first, it doesn’t let you in, asking for a password or office connection. And when you finally get in, it’s a website that is supposed to be ready in twelve hours. So you get to work and start screenshotting any weird-looking parts to send all of that to the designer, then pray the stakeholders won’t have another fifty million screenshots.
That’s how to review a website! I mean, there’s another way, but you have to keep reading to find out.
How website proofing works (really)
Aha, so you do want to know what another way is. Well, traveler, you got yourself onto the right boat. Let me show you a real, effective way to review websites.
Website proofing is a structured process of reviewing live web pages inside a dedicated tool. Reviewers load the URL, annotate on the rendered page inside the tool, compare versions side by side, and record their approval separately for each stakeholder.
The process of dedicated website proofing is much easier than a classic approach with screenshots, calls, or verbal communication because it makes the review process more visual and contextual. Usually, you can add reference files of how you want something to look, change viewports without Chrome DevTools, and even verify correct colors across the site if something looks off.
Overall, a good tool makes the website review process better for everyone. But to show you its real efficiency, let’s go through the guide on how to collect feedback on a website using Approval Studio’s new website proofing feature.
Step 1: Create a review
First things first, you need to create a project in Approval Studio and fill in all the important information about whichever site or page you’re working on at the moment. This can mean adding a deadline, project description, client name, tags, etc.
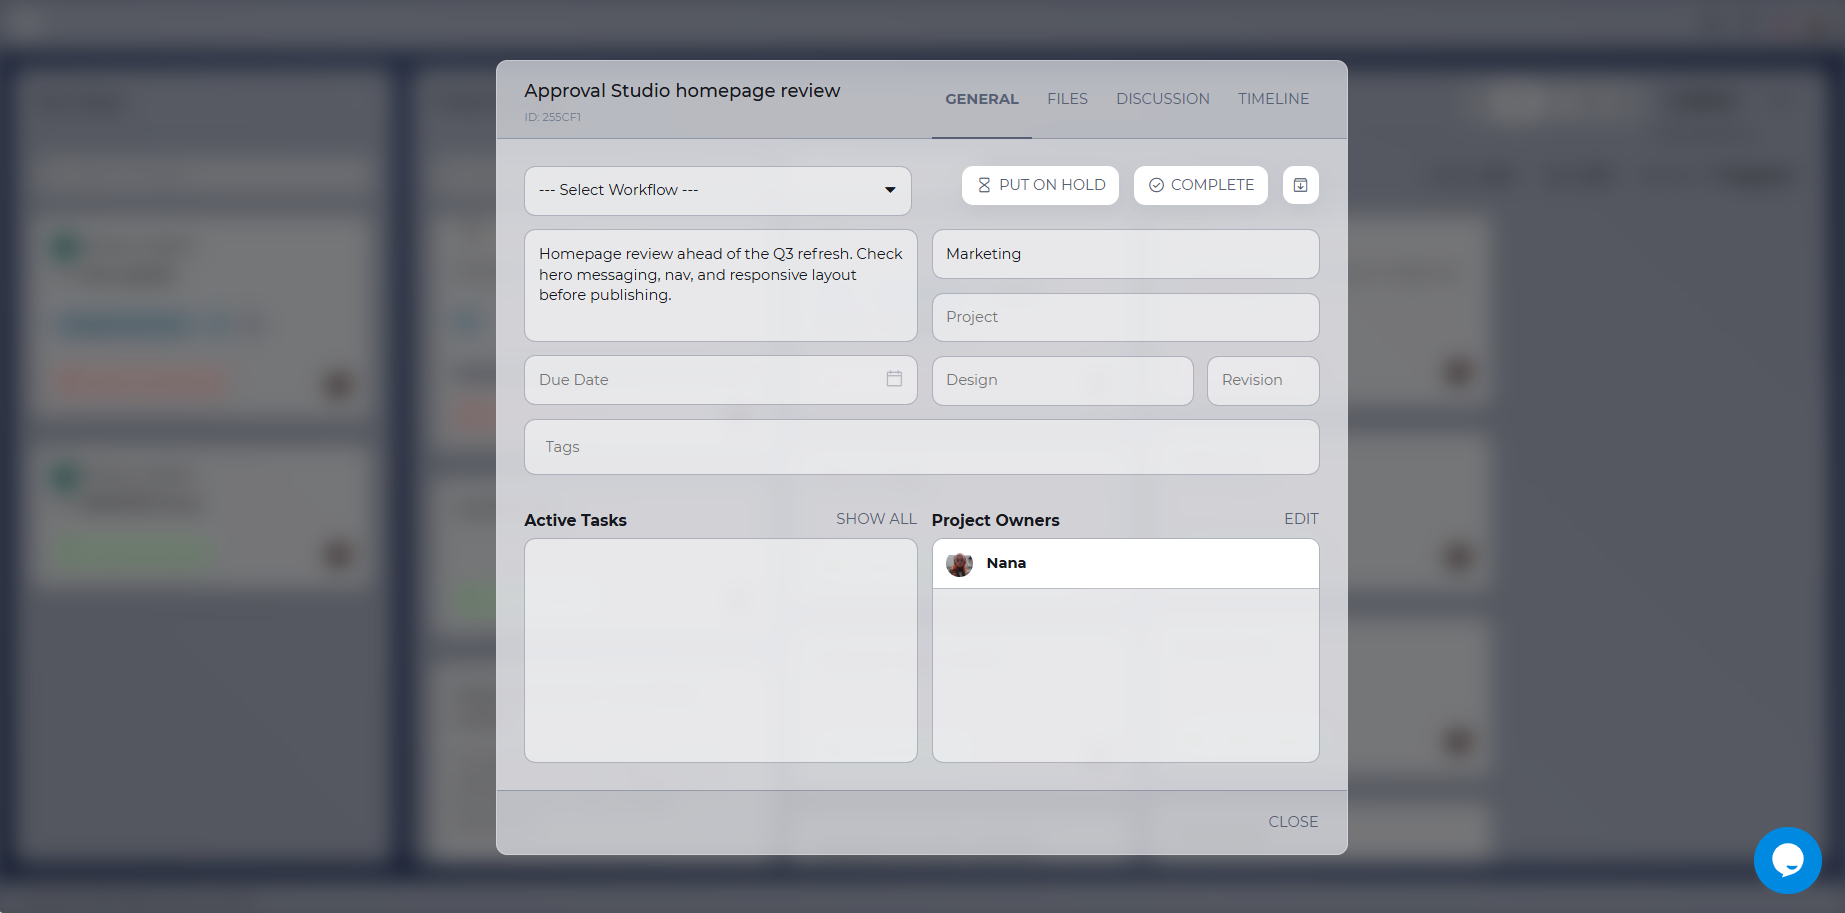
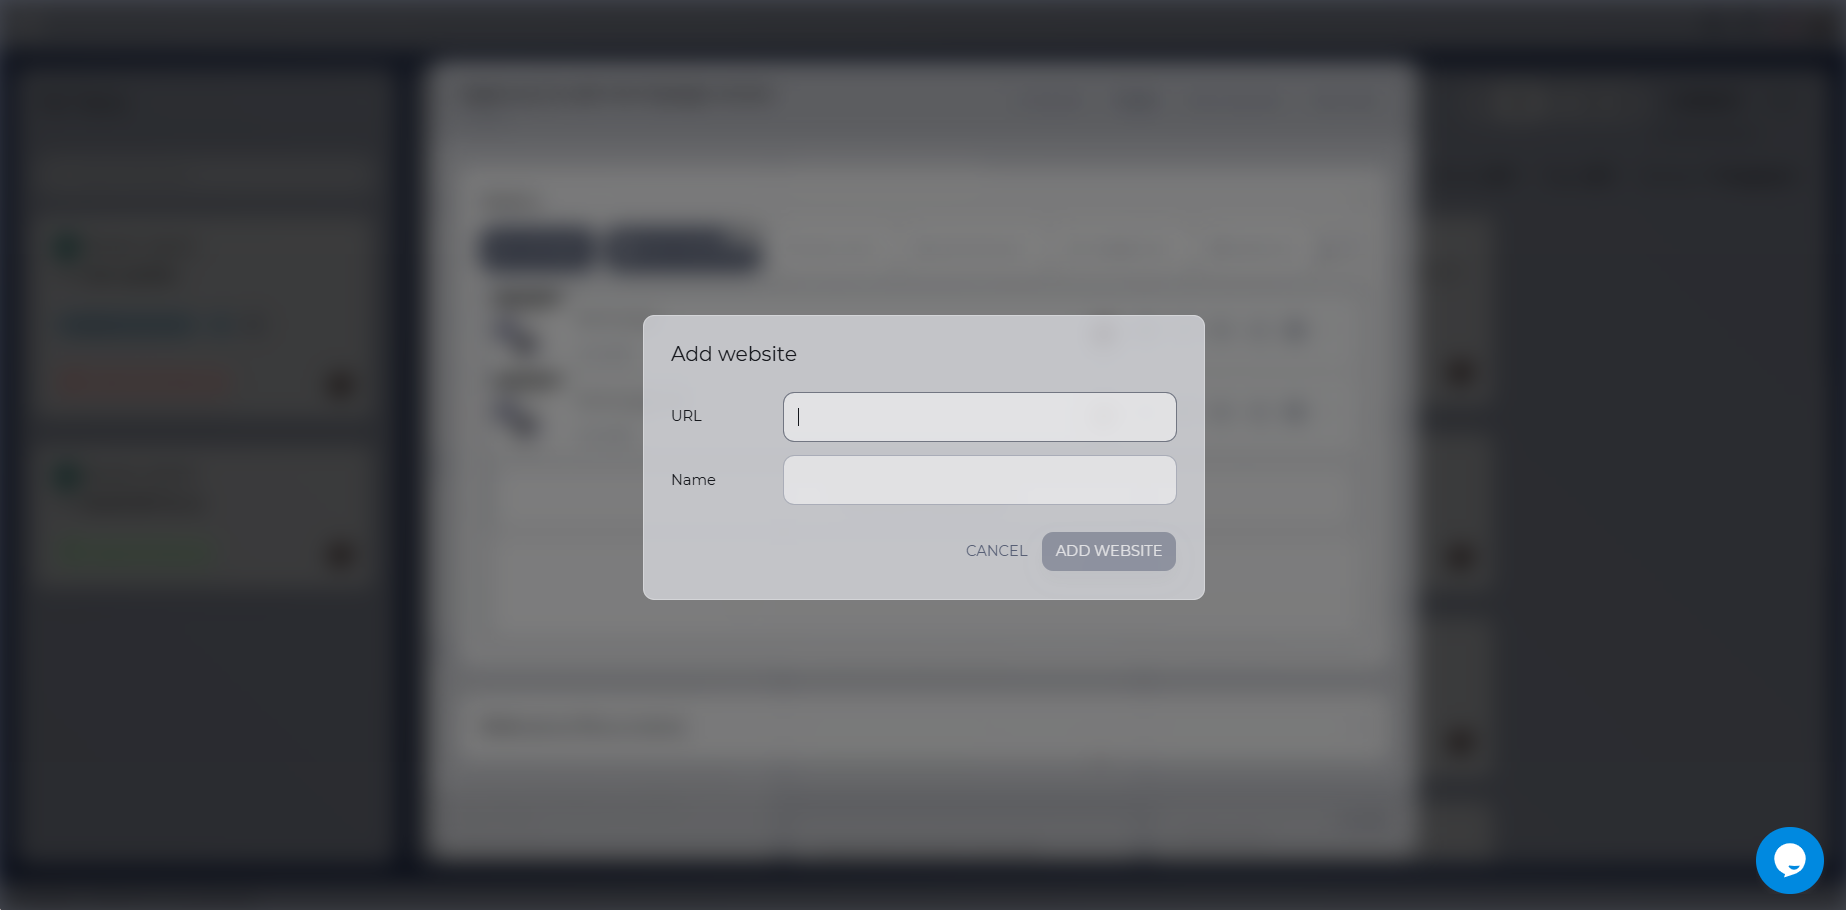
To add a website, click on the corresponding button in the assets. The system will ask you to add a website URL and a name that will be displayed for this specific URL.
You can add multiple pages inside one project and review them all together or create a different project per page, depending on your internal workflow.
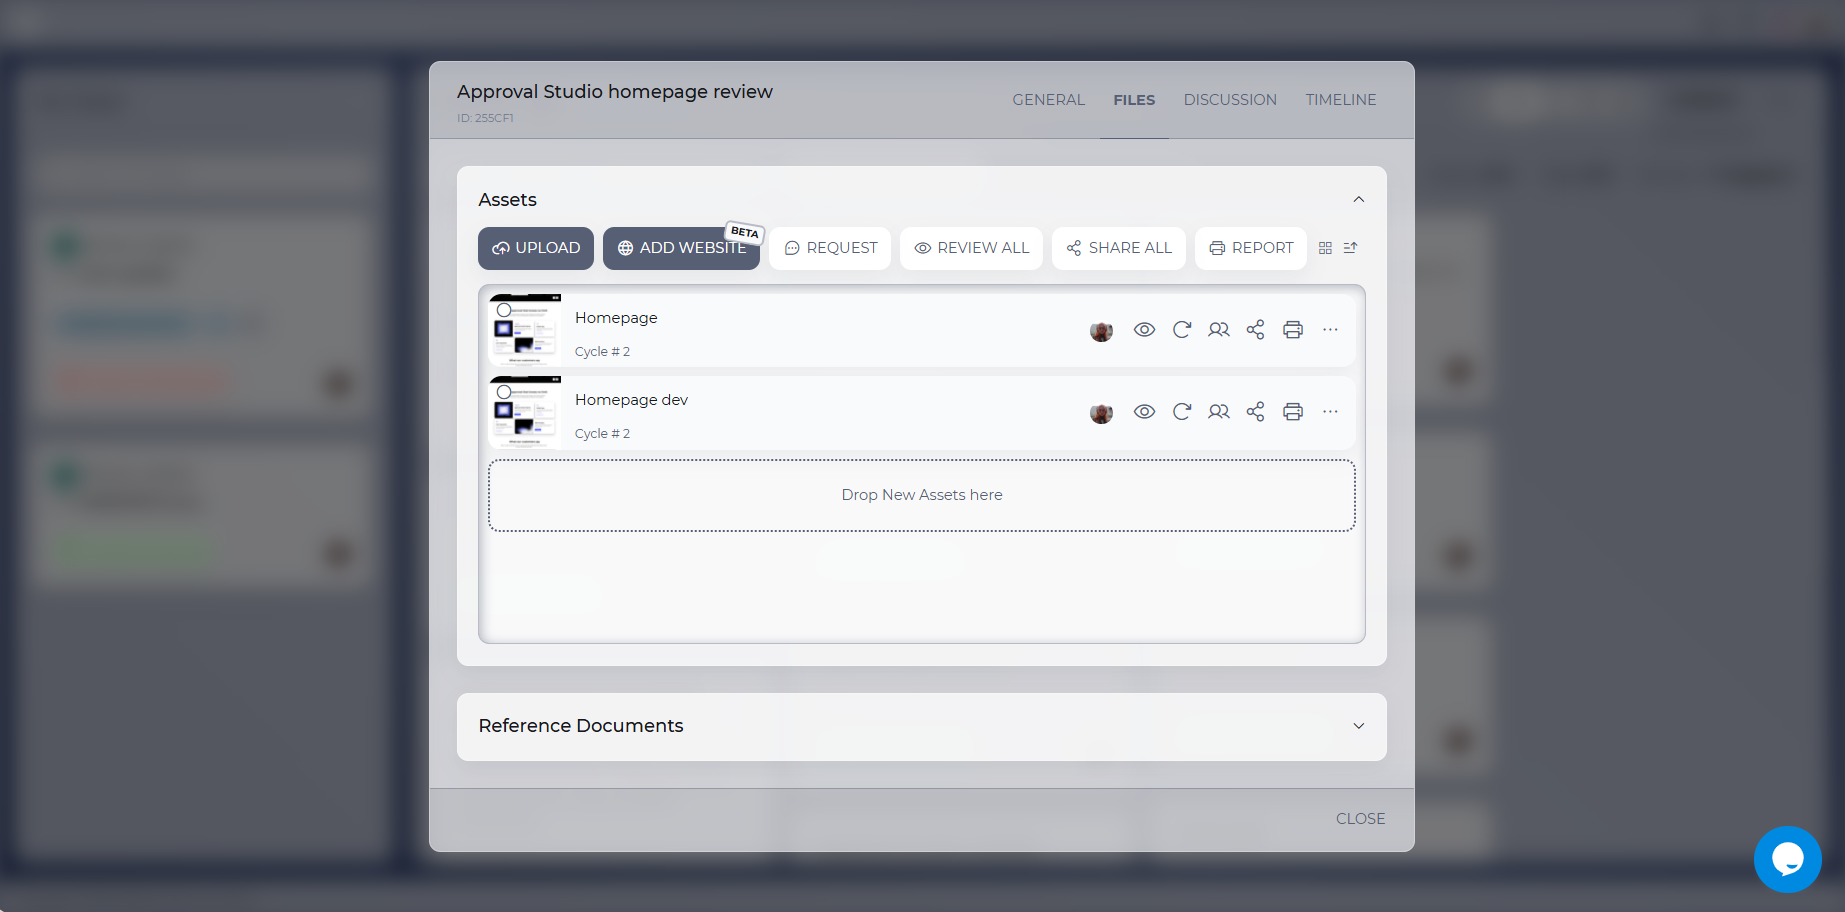
You can add any password-protected or limited-access URL to review. The main condition is for you and the reviewers to be able to access it outside the tool.
After a few seconds, the live page is ready to be reviewed. All the animations, videos, and links are workable, so you can check how the site is working without leaving the review tool.
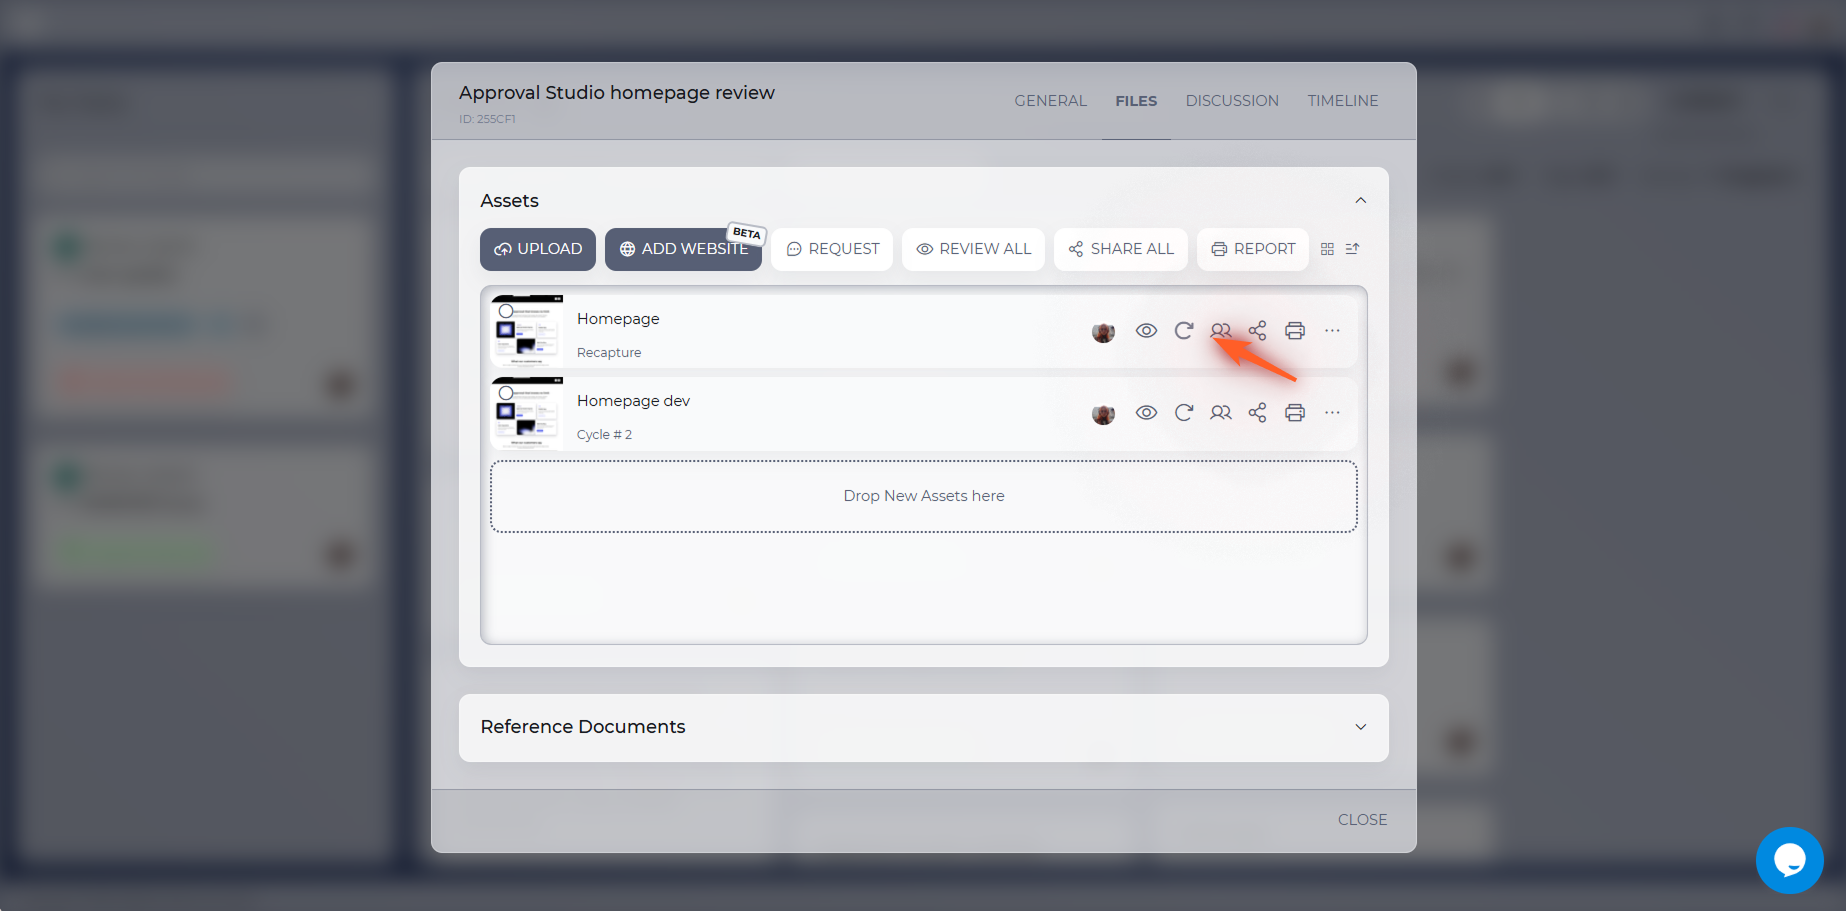
To start a new cycle, all you have to do is “Recapture” your site.
Step 2: Invite people
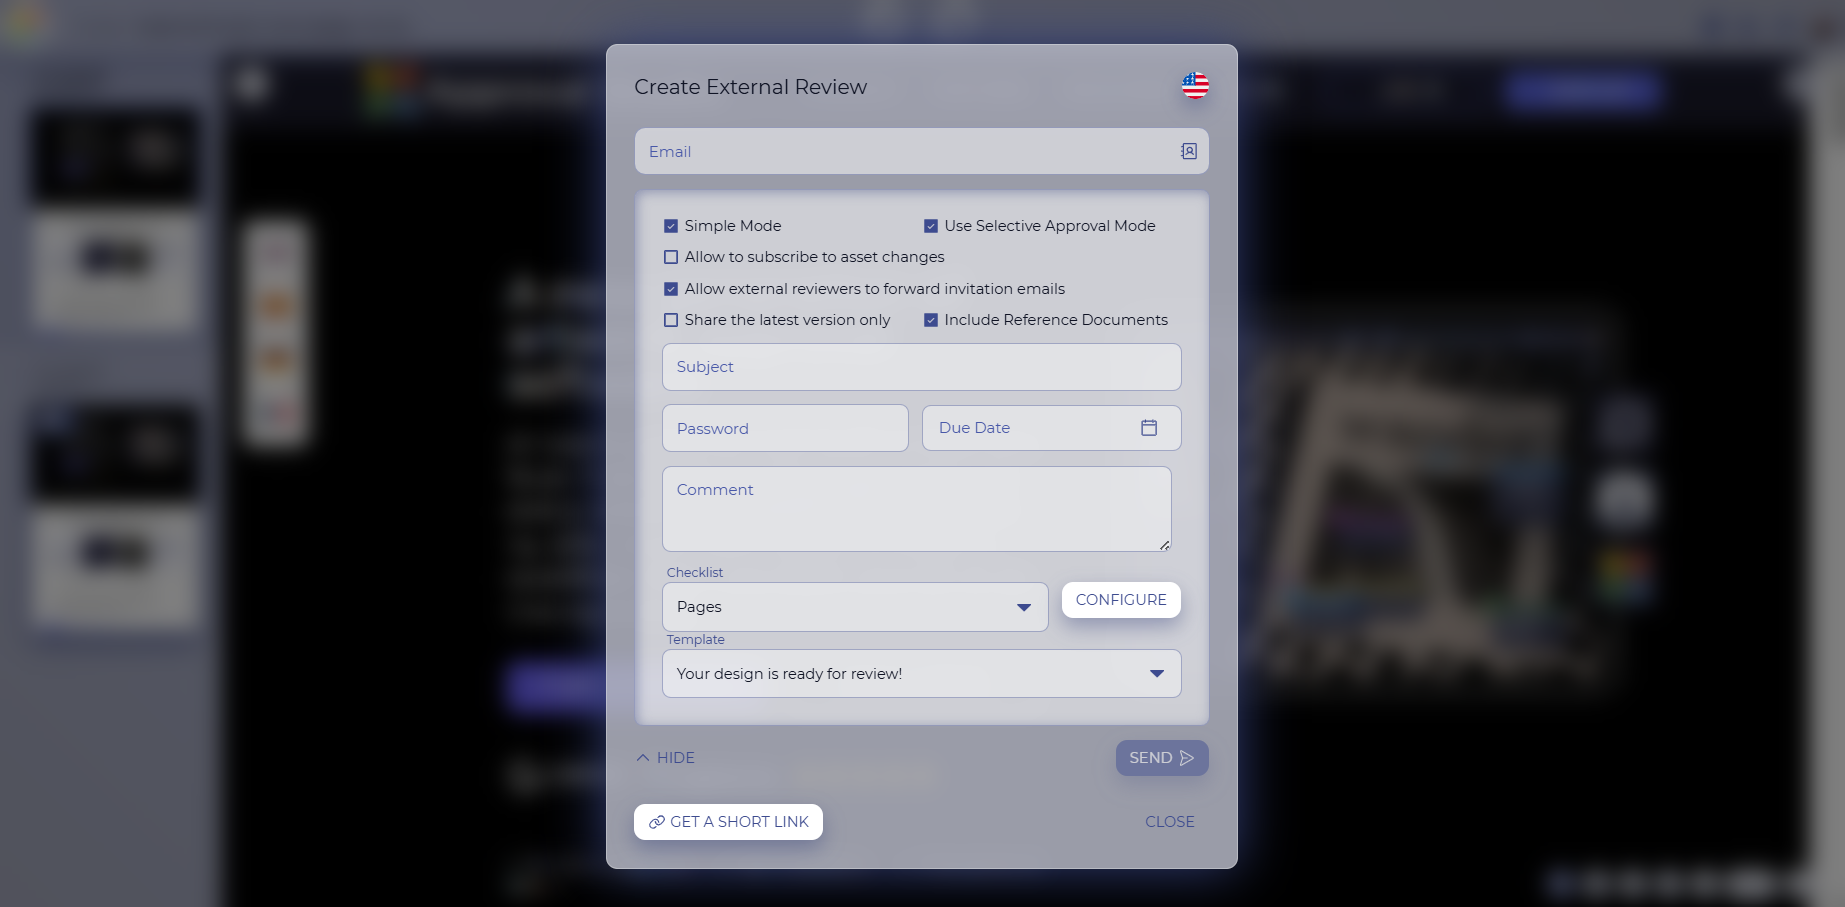
Now that you have created a review, it’s time to invite others to the party. There are two main ways to invite reviewers in Approval Studio: via email or via a short link. Use whichever, or even combine the two, depending on the communication you’re using (e.g., a short link for the internal team, and an email invite for stakeholders or upper management).
You can customize the invitation as you please: add a checklist, due date, make a personal email text, attach reference documents, and much more. You can see all of the possible settings in the screenshot below.
All the external reviewers (even those invited via a short link) will be visible on the top panel if they’re currently reviewing, or in the project timeline, along with all the actions that they take.
Step 3: Review & Annotate
Now, the fun part! You get to review the site and leave comments. Not only is it fun because you get to tell others your opinion, but also you get to do that with multiple shapes and colors when it’s in Approval Studio. Click on the pencil icon on top of the site to start annotating. Now, every page click will result in an annotation box, giving you a place to express yourself. To check the elements, click on buttons, or do any other action connected with clicks, exit the annotation mode by clicking the pencil icon again.
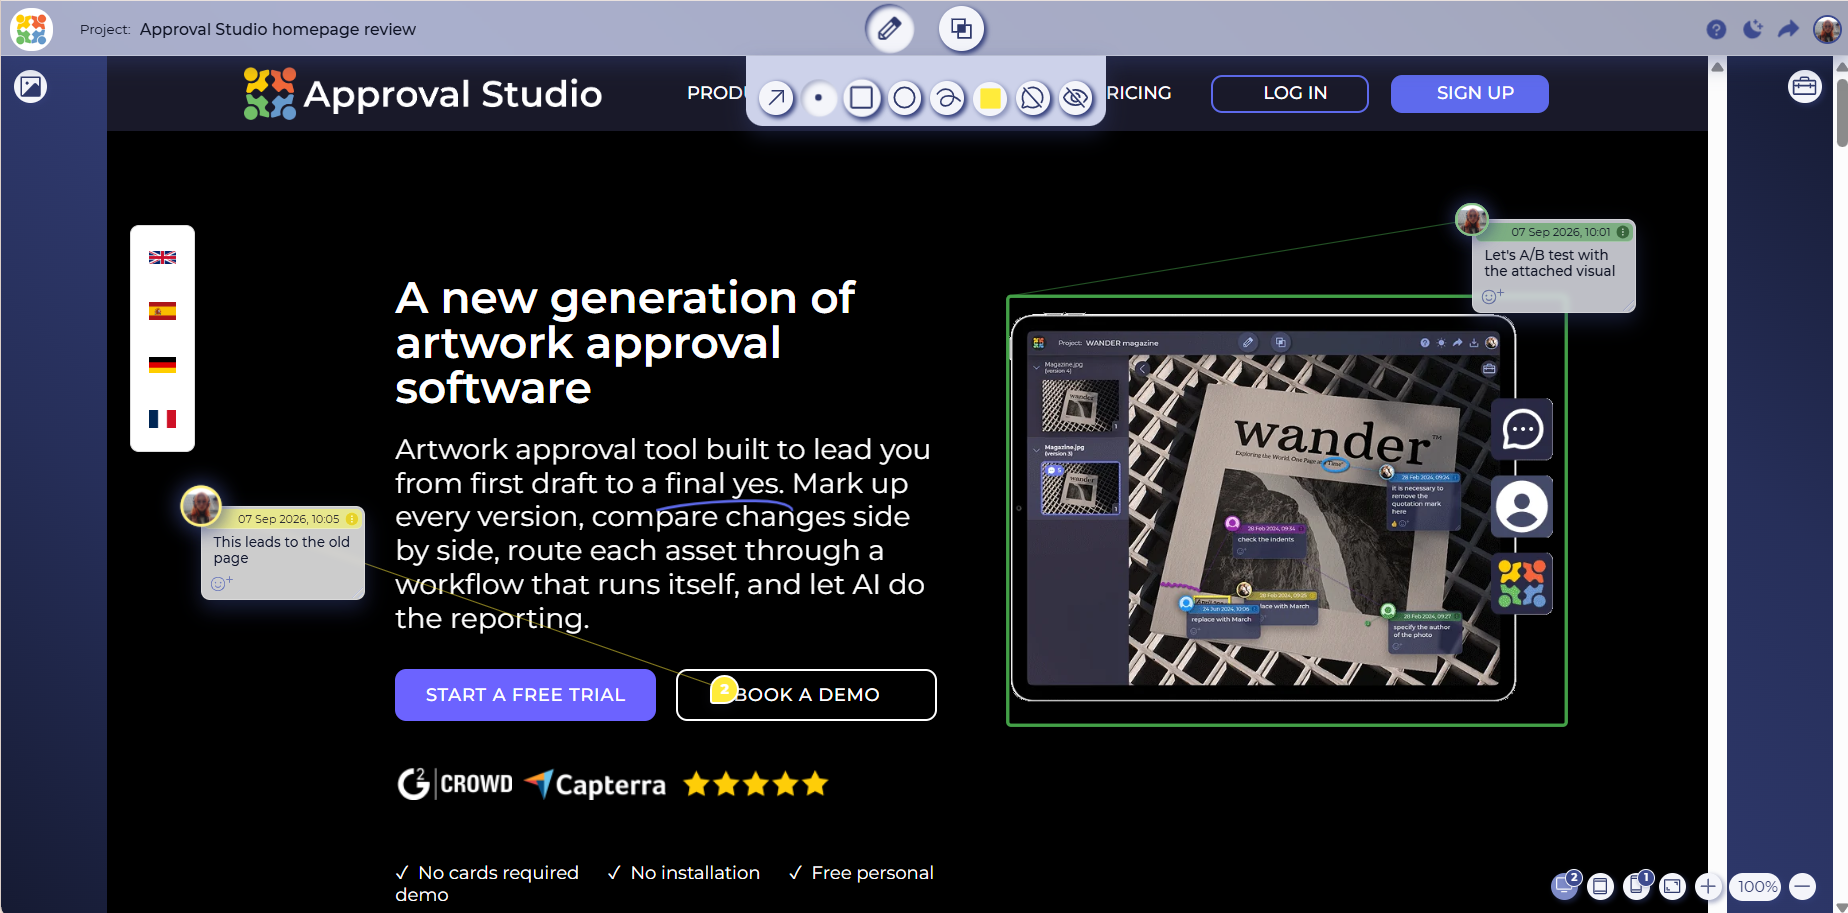
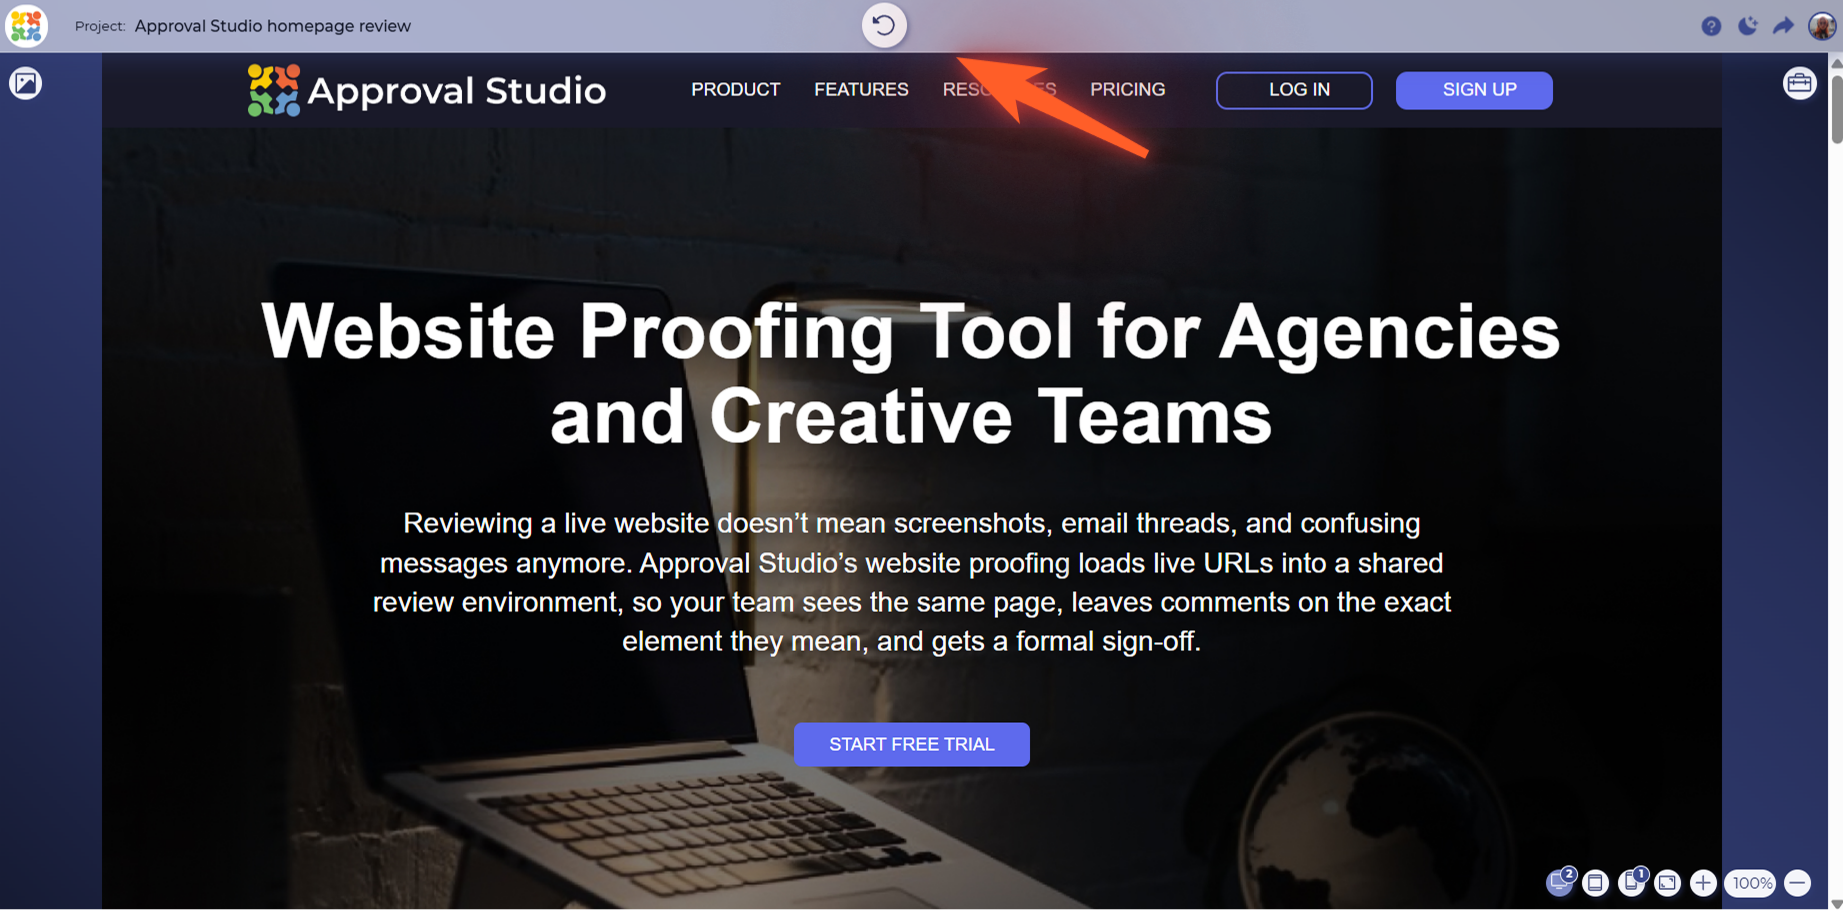
By the way, all the clickable elements are working in the review tool, and you can go wherever they’re leading you. However, you won’t be able to annotate those pages. If you would like to come back to site annotation, click on the top button to open the intended page again.
You (and other reviewers) can leave as many annotations as needed and change them at any point. All the most beloved review and annotation features that are available for static files in Approval Studio are also available for website proofing.
Website proofing uses the same review tool as every other file type in Approval Studio. Want to see everything it can do? Check out the full review tool capabilities.
Step 4: Pick your viewports
This is very important. What looks great on desktop might easily be broken on mobile or tablet. Depending on how the website is made, different elements can be built for mobile, tablet, and desktop. And verifying that those elements are not overlapping, being duplicated, or just ugly is important for the website feedback process.
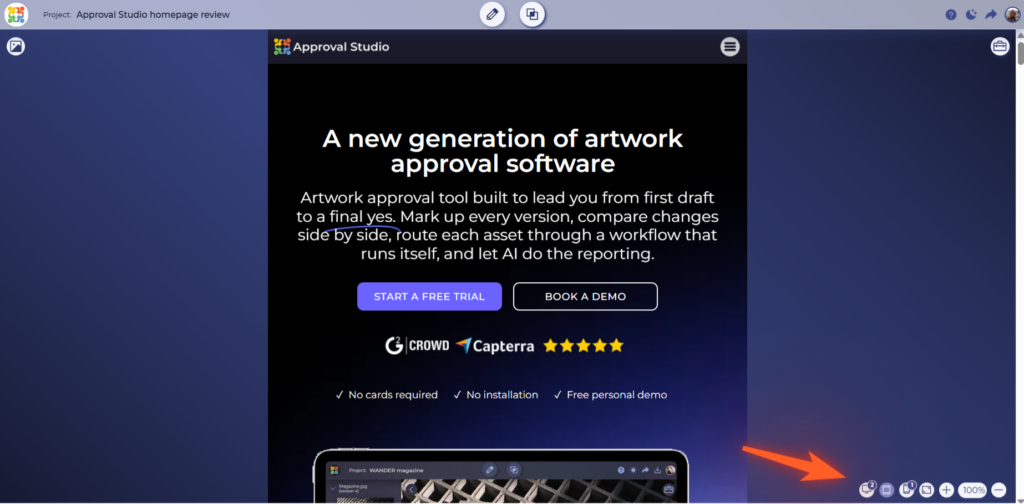
In Approval Studio, you do that with a single click. You see, when the website is being captured, it happens in the three viewports at the same time. And to check how it looks, all you have to do is click the corresponding button in the bottom right corner. The system will automatically record comments in a different view for mobile, tablet, and desktop so as not to mix up the feedback.
Step 5: Compare versions
This is something that is not really available with traditional website proofing. Yes, you can use your eyes to compare the screenshots you’ve made with the new version of the site; however, it doesn’t really give you the full picture.
In Approval Studio, version comparison is a native feature. All you need to have is an original capture of the website and however many subsequent captures. Then, click on the compare button at the top of the screen, and choose any two versions you would like to compare. There are four distinct modes (Side by Side, Side by Side with Difference, Fader, Toggle) to help you make sure none of the changes go unnoticed.
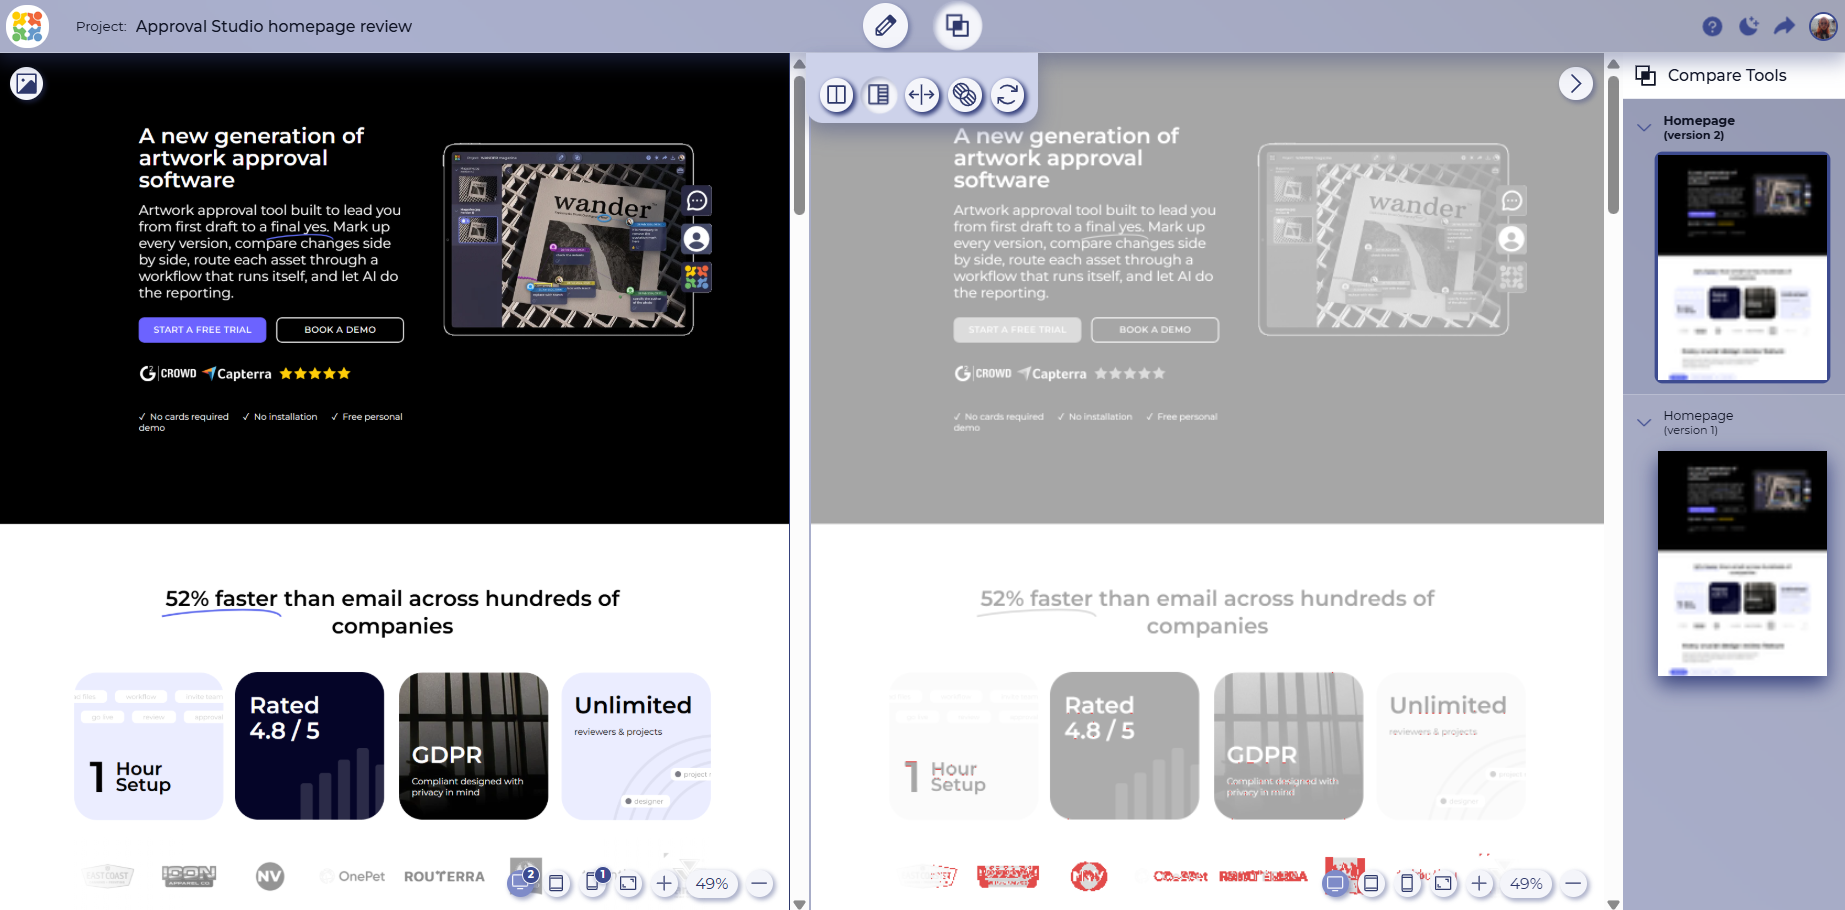
It’s important to note that the comparison happens between two static elements, so if you would like to test animations on different versions, you will need to exit the compare mode.
Step 6: Approve or Reject
Now that you’ve seen every inch of that website, it’s time to make a decision. Luckily, you don’t have to close the review tool, open a chat or an email, and write a “Reviewed, left a few comments” message. At the top of the screen, every reviewer (meaning a person who accessed the tool via a short link or email link) will see two prominent Approve and Reject buttons that they can click to let you know their decision.
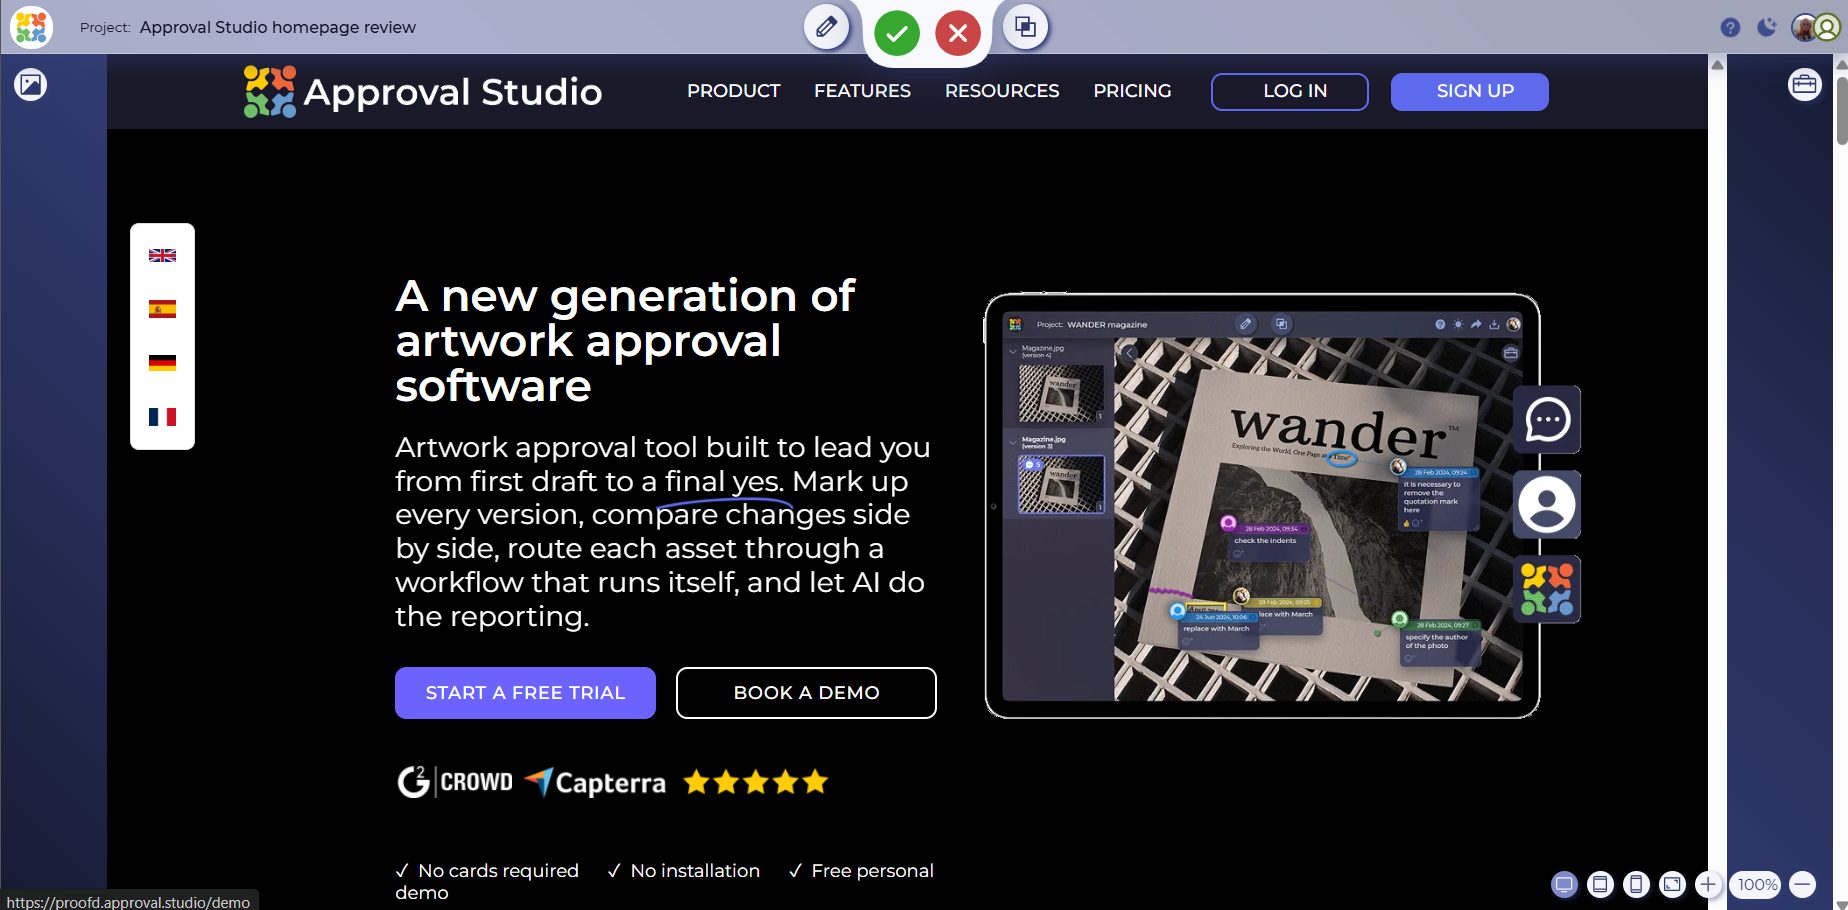
After each reviewer makes a decision, a project owner will get a notification with it, eliminating the need for extracurricular communication. If everyone approves, great. If there are rejections, a project will just start a new cycle.
Step 7: Reporting
This step is additional, but in companies where compliance and traceability matter, a nicely done report is crucial. There are two types of reports in Approval Studio: proof report and project timeline.
The proof report can be exported from the asset menu for each individual asset or for every asset in the project. It breaks down all the actions done on the assets specifically.
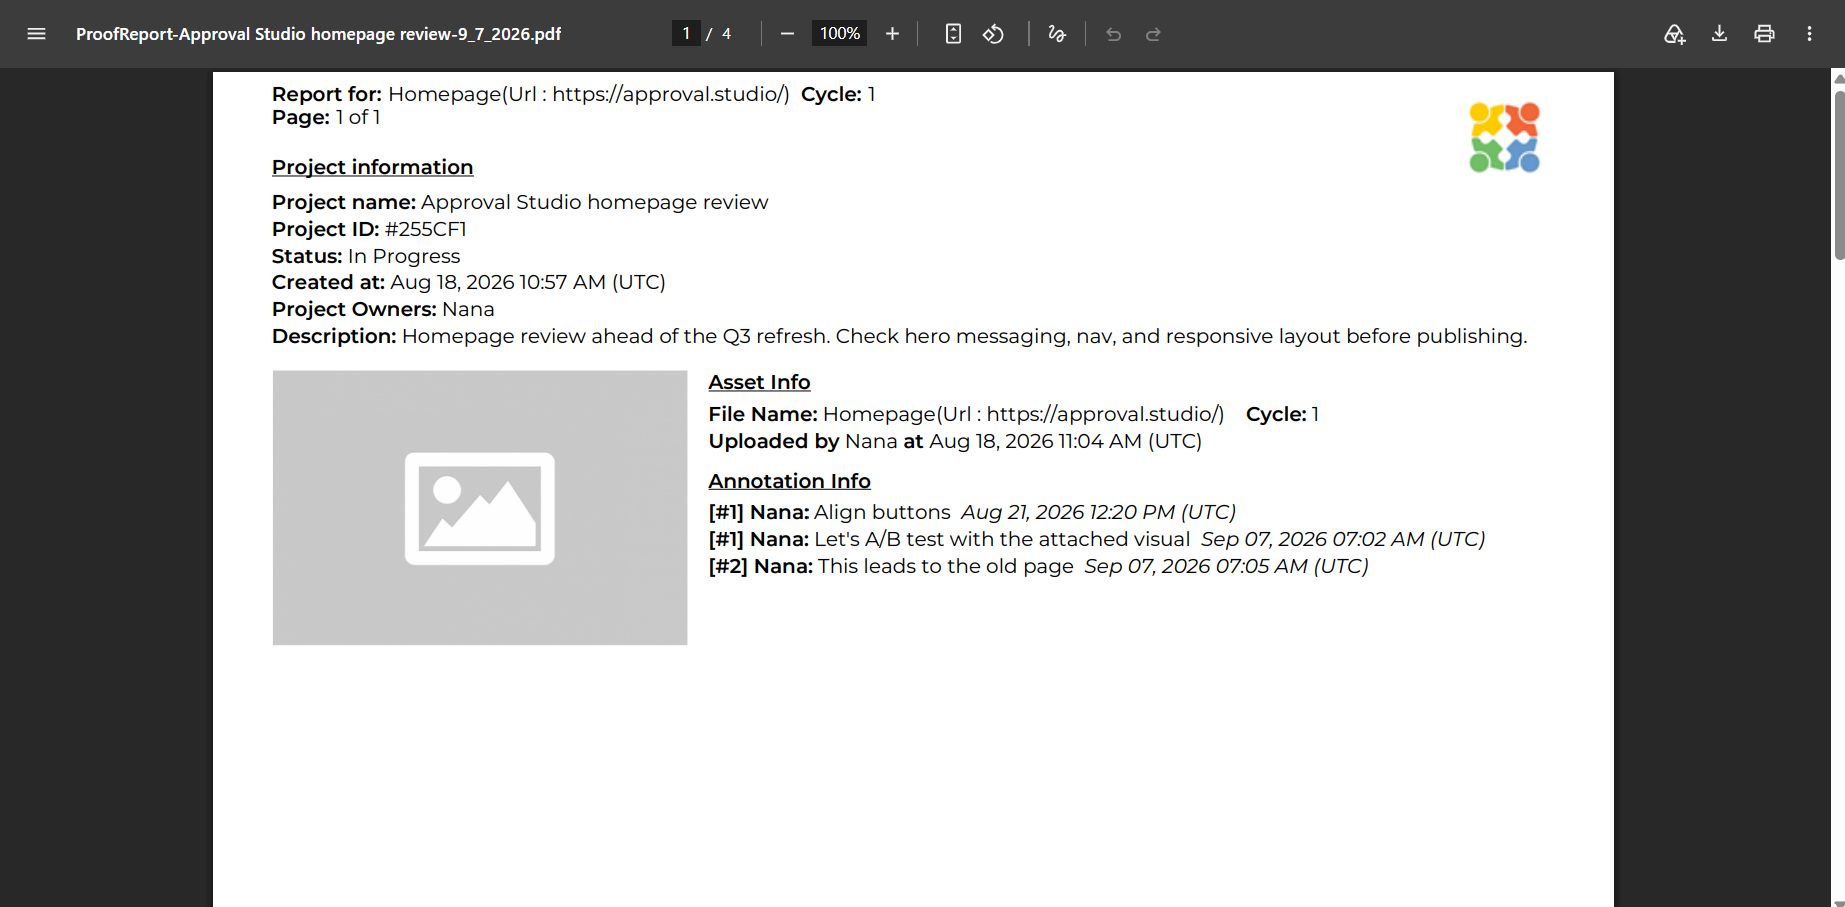
The timeline can be viewed inside Approval Studio or exported in PDF or XLS format. This report will display every single action done to the project, all its assets, and reference documents.
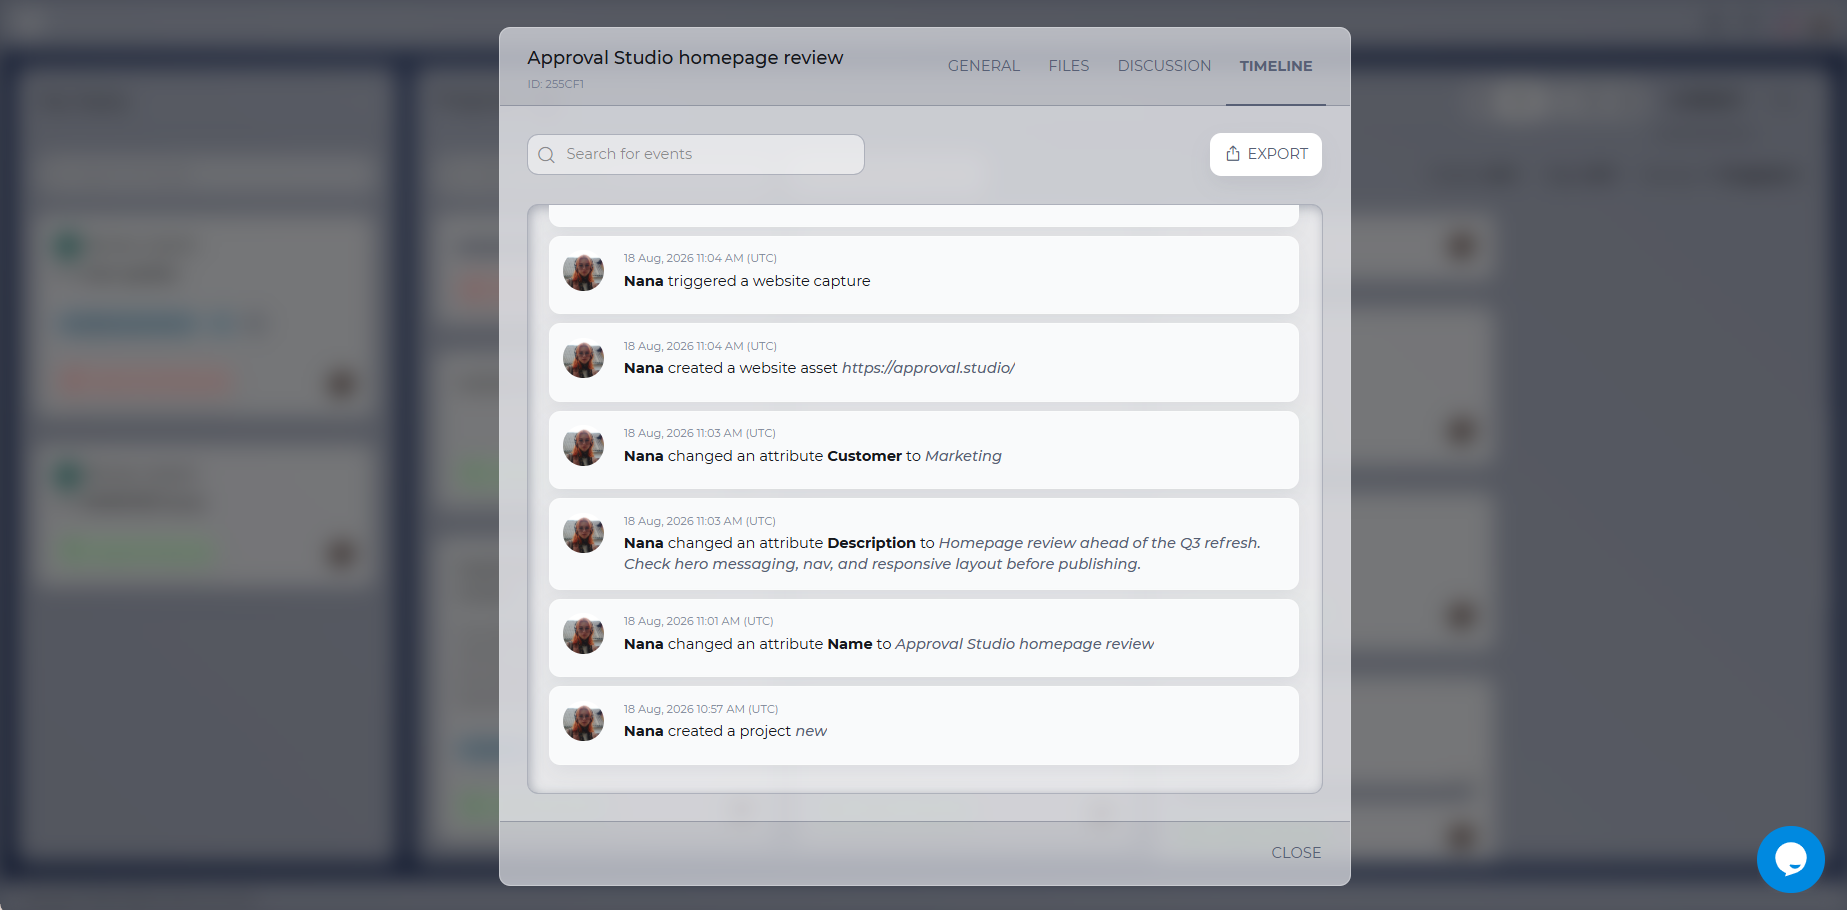
Between the two, you get a documented approval trail for handoffs, for audits, and for the conversations you didn’t know you’d need to have.
When do you need website proofing?
I don’t know about you, but I always get so excited hearing about new technology, and I don’t always think whether I really need it. Well, it’s the same with website proofing. So, here are 4 specific scenarios (that can be a part of the same review process) when you do need website proofing.
- Pre-launch QA: that’s my example from previously. A pre-launch period is always chaotic. You have to make sure that everyone loves the design, there are no mistakes in the language and design, and ideally not a single person is illegally overworked. A tool that brings all the stakeholder feedback into one place is a gem
- Localizations: no one wants to discover that the German version of the term breaks the entire design after the page is live. With localizations, you add different language versions to the project and review them at the same time to see what’s working and what’s not.
- Landing page campaigns: when four different departments are reviewing four different aspects of the page and none of them is satisfied, you get a pile of feedback in four different email threads. Or, you get all of that inside one tool.
- Redesigns: a feeling of “We want something new” doesn’t always coincide with the fact that “This has been working well”. And you can prioritize the feeling over the fact if you don’t always have the old version in front of you. But you can have it if you capture it beforehand and then compare it with the new version.
Overall, the golden rule is: if there are important buttons that have to be clicked, animations that can break on mobile, or more than two people who are reviewing the same page, do go for a website proofing tool.
Final words
I’m going to be honest, but as part of a marketing team, I’ve loved every single second of using our website review tool. It got my review time down from half an hour per page to less than 10 minutes. And that helps me focus more on the page without thinking about how I don’t have the time to review all that. So, if you want to try a better way to deal with websites, start your free trial today and see it for yourself. Website proofing is currently in beta, so if you run into anything or have ideas for how it should work, reach out to us. We’re still shaping this and will be happy to hear your feedback.