 TEAM SOLUTIONS
 WORKFLOW SOLUTIONS


 REVIEW TOOL
 PROJECT MANAGEMENT
 TOOLS & INTEGRATIONS
 CLIENT INTERVIEWS


A professional online review tool is, without a doubt, the cornerstone of any successful online proofing and design feedback software. Being such and acknowledging the constant need for improvement, we are happy to present the third version of our Review Tool in as few as six years. However, what makes the Review Tool 3.0 special, and how can you use it to its full potential?
What Is a Review Tool and Do I Need It?
For those familiar with the design and packaging industry, the challenges of securing artwork approval are all too familiar. While some might underestimate the complexity of the review and approval process within product creation, it’s essential to acknowledge that every facet, including design review, is crucial in upholding a product’s quality and reliability. Navigating through these multifaceted steps demands collaboration with a wide range of specialists in order to develop a product that not only meets but exceeds market expectations.
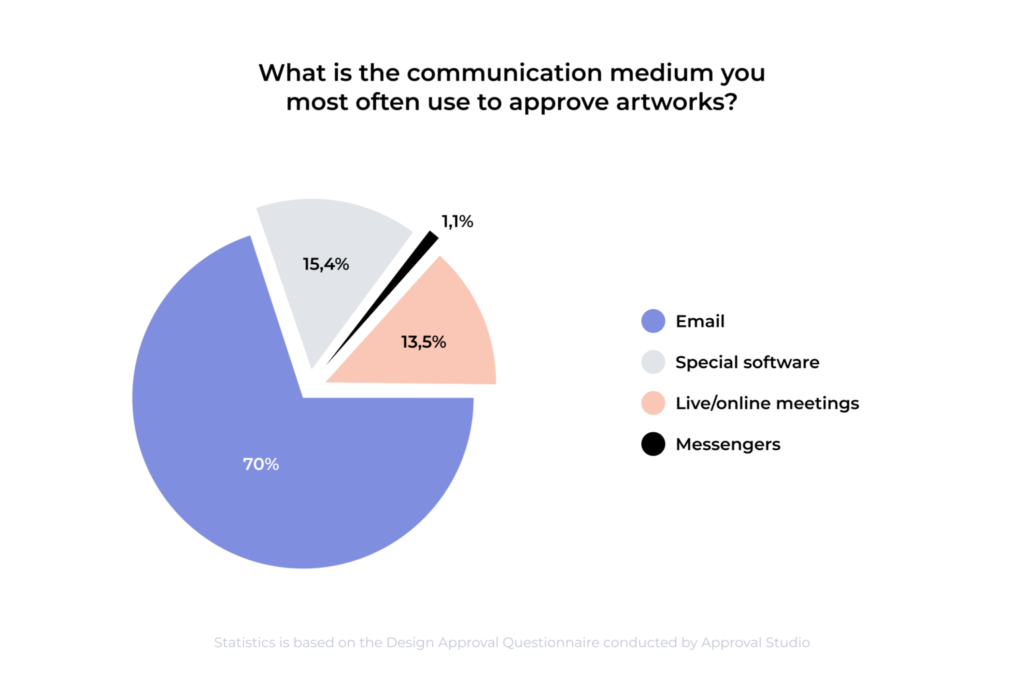
This is where lies the crux of the issue: the difficulties that come with working together, especially if you are not in one office. We have recently completed a study that revealed an astonishing fact: around 70% of professionals still relied on email-proofing for their approval workflow management despite email being a flawed medium. You know the drill: emails get lost, require extra time to be composed and delay the project at its core. This is the point at which an online proofing tool becomes essential.
Not only can an online proofing tool help you to make design and collaboration processes more efficient, but also it can provide an almost painless design review process. You can annotate, scan barcodes, discuss online, view differences in comparison modes, and more using Approval Studio’s review tool. If you are curious, continue reading this article to find out more about our Review Tool 3.0.
If you are not part of the Approval Studio community but take interest in the design industry – don’t be hesitant. With its (nearly) ideal balance between design and functionality, Approval Studio is one for you if you need to assure an easy online design approval procedure while maintaining good quality. You can sign up for a demo, or sign into a free version and check whether I’m telling you the truth😉.
Overall Appearance
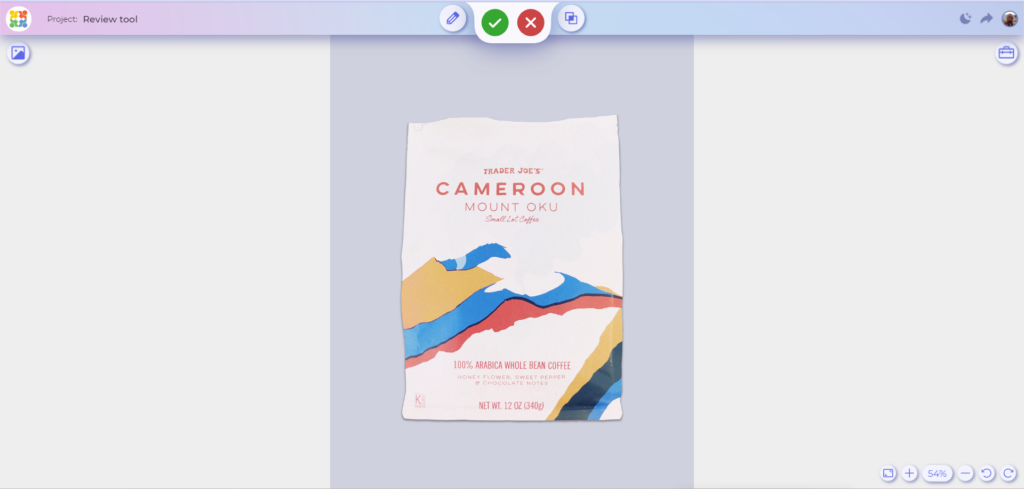
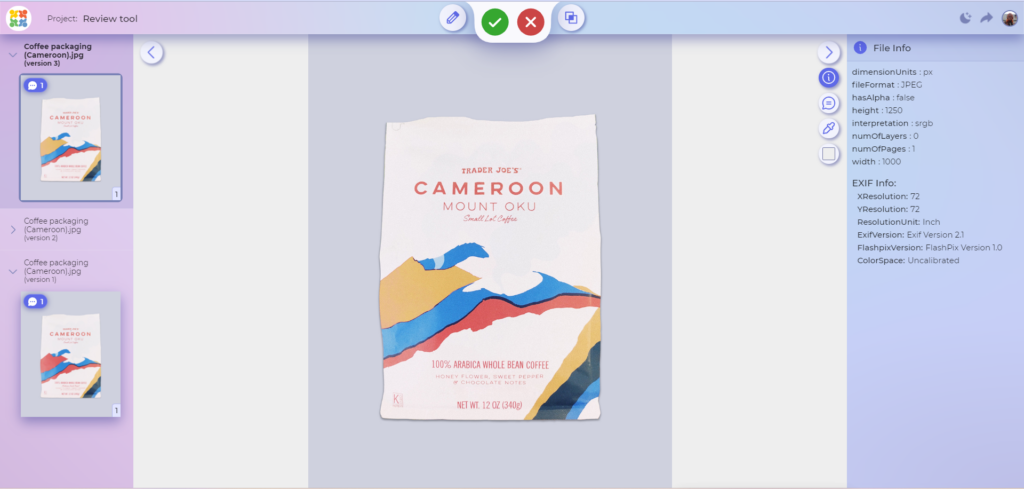
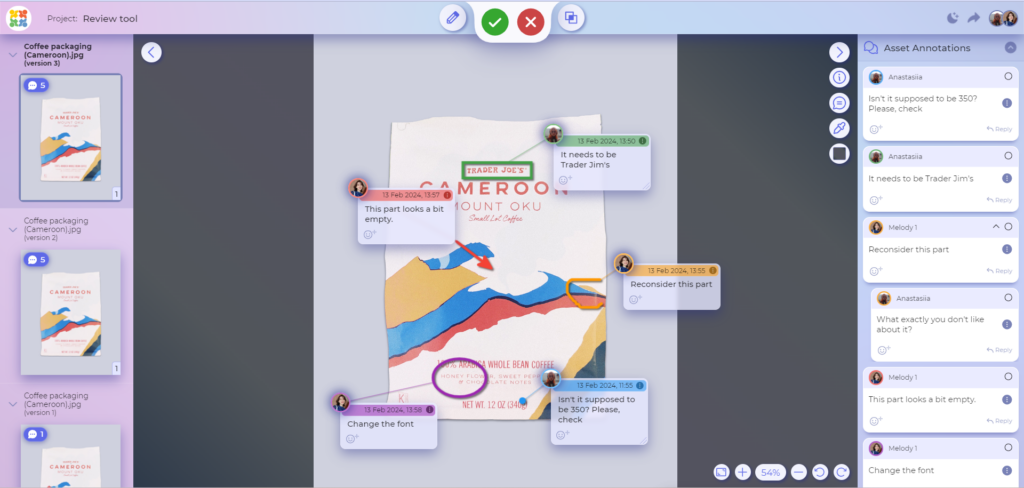
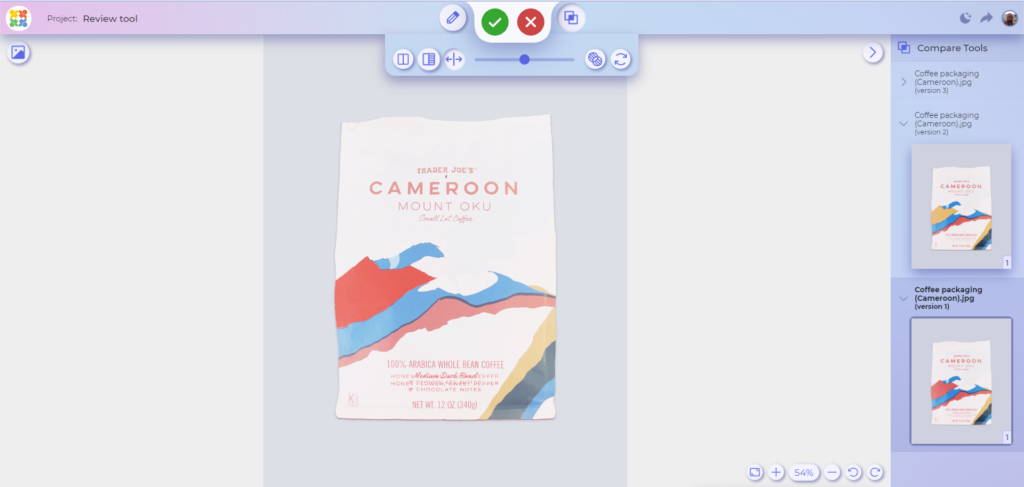
Why don’t you take a look at this beauty! Regarding the overall look, the change in color scheme immediately catches the eye and makes work much more enjoyable and comfortable. The project itself takes center stage along with the most crucial buttons.
Let us go into greater detail about everything we can see here. Your project name and logo (which you can customize) are located in the top left corner. Below it, there is a Show Assets button which we will discuss a little later.
Further to the right on the top panel, there are four of the most important parts of the whole design approval process. In the following order, you can see an Add Annotation menu, Decision buttons, and Compare modes. We will discuss their usage more thoroughly in the next sections as well.
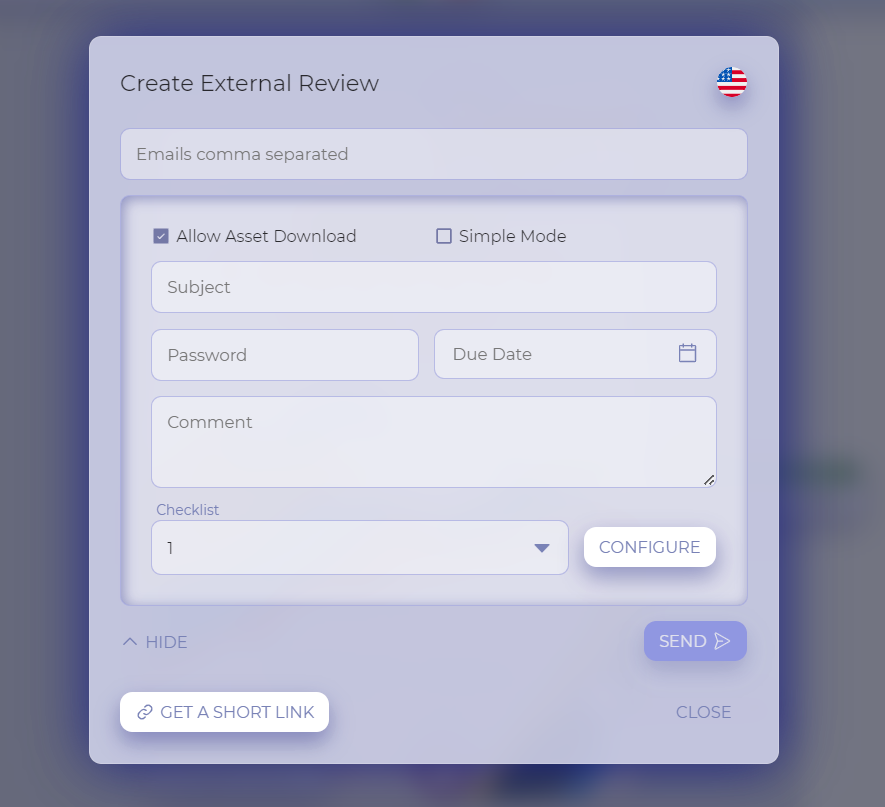
Next, in the upper right corner, you have the option to switch between bright and dark modes and share the asset for external review. The functionality of the Share Review button hasn’t changed – you still can invite external reviewers without the need for them to register. However, now you can enjoy its stunning design.
Lastly, the control buttons are found in the right bottom corner. With their help, the image can be rotated, zoomed in and out, and fit to the screen.
Side panels and their features
Right Panel

Let’s go a little higher from the control buttons and click on the Show Tools Panel. Here you can find all the supplementary tools that might be used in the approval process. I will demonstrate the right panel’s features and tools in a list as all of them are quite intuitive.
- File info: displays all relevant file information, such as format, size, resolution, etc.
- Project discussion: allows a real-time discussion with all of the external and internal reviewers.
- Eyedropper: allows you to view a document’s colors in a variety of color models, including RGB, CMYK, and PANTONE.
- Pick background: lets you personalize your workspace with one of the default colors
Left Panel
Now, move to the other side of the review tool where the left panel is located. This one is fully dedicated to the Show Assets button. Upon clicking on it, it reveals a view of all versions of the document you are reviewing. By switching from option to option you will see all the screen annotations (from external and internal reviewers) made on each asset. Furthermore, you can annotate the older versions without the need to leave the proofing tool.
Top panel and its features
Top panel, as I mentioned previously, has the most crucial parts of the review tool, as it consists of all the instruments most needed for review. We believe that those are Add annotation menu, Compare Modes, and Decision buttons. The design has been changed so users can see all those tools right away. This top panel structure was created thanks to the priceless feedback from the customers, who helped us to make the review tool even more intuitive than ever.

Annotations
Even though annotations functionality hasn’t changed, this version seems much more sophisticated due to changes in design. Add Annotation button is one of the first things you see upon entering the review tool. This makes it so much easier for external users to approve the assets without extra fuss.
Annotation tools allow users to effortlessly add precise commentary using arrows or points, quickly draw attention with squares, enclose areas of interest with the help of circles, or express their own minds through free-form annotations. By using such a wide range of possibilities, you can accurately capture every thought and tiniest detail, speeding up your design review process.

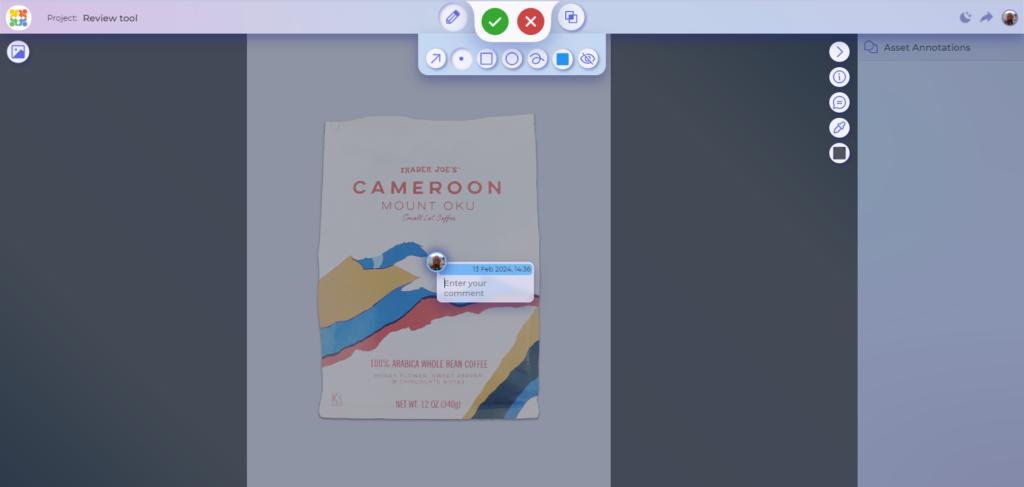
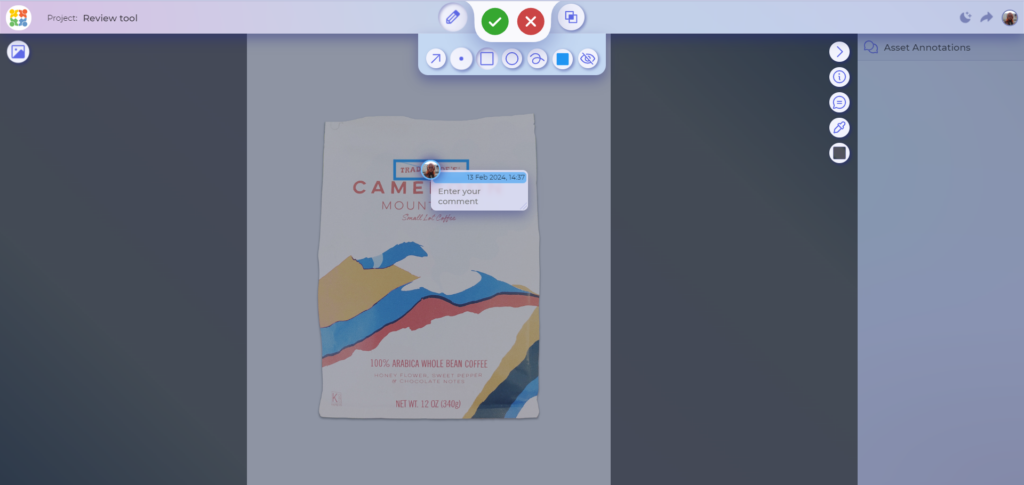
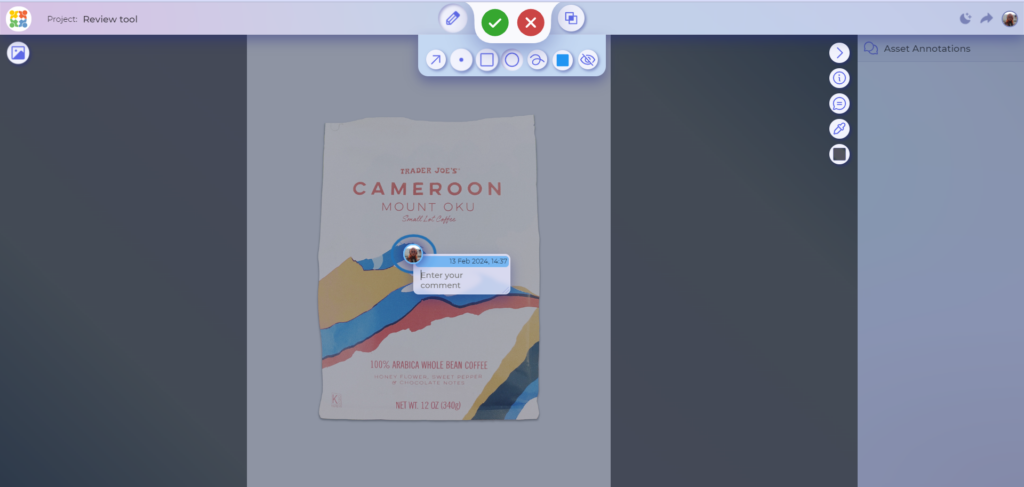

But it doesn’t stop at mere shapes; color customization takes the experience further. With the ability to change the color of annotations, users can signify importance, convey emotions, or categorize their creative feedback. This helps to enable swift comprehension and alignment among team members.
If you feel like your vision of the mock-up is crumpled by other comments, quickly conceal those using Hide Annotations tool. You will not be able to add new annotations, but there will be a possibility to study the asset without any distractions.
Compare modes
Now, let’s talk about the star of the show: Compare Modes. Without a doubt, a skilled designer can easily distinguish even the most subtle variations in colors, shapes, and fonts. However, the new Review Tool’s compare modes, make creative approval workflow faster and more effective.
Upon clicking the button on the top panel you will be able to see 5 different buttons that correspond to the 4 compare modes and their versions. Lastly, there is a possibility to either show or hide existing annotations, adapting to your preferences. However, there is an important side note. You will not be able to see the Compare Modes menu if your asset has only one version. So, upload one more version, if you haven’t already, and let’s discuss how these modes work!
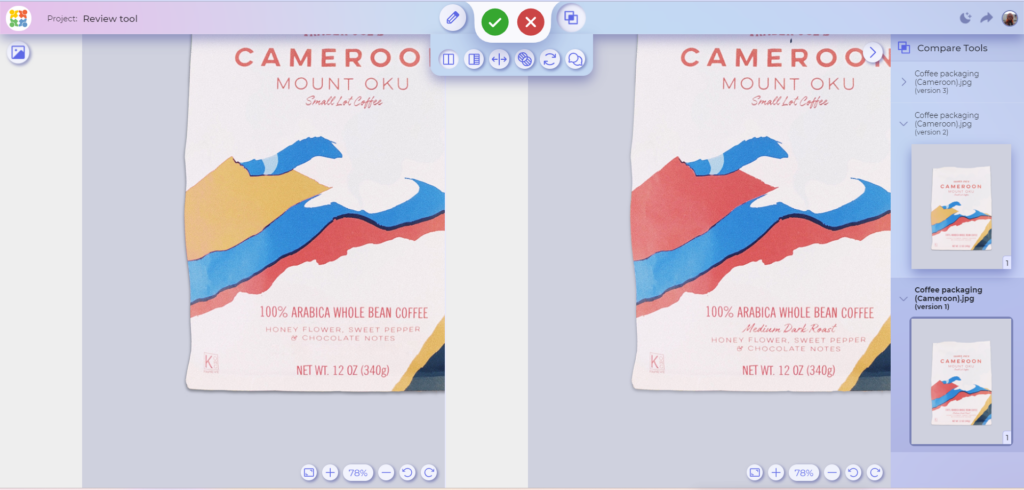
A traditional Side by Side view will be the very first mode you see. Instead of toggling between two open tabs, this mode enables you to observe all the changes side by side in the review tool. It does not matter if you only want to look at a portion of the paper or the entire thing. Zooming in and moving one side causes the other to automatically move in the same direction.
Can’t spot the difference? Don’t waste your precious time on it, then. Click the next button and open Side by Side with Difference, which is a version of the previous mode. With its help, you can view both documents while the tool highlights all the differences.
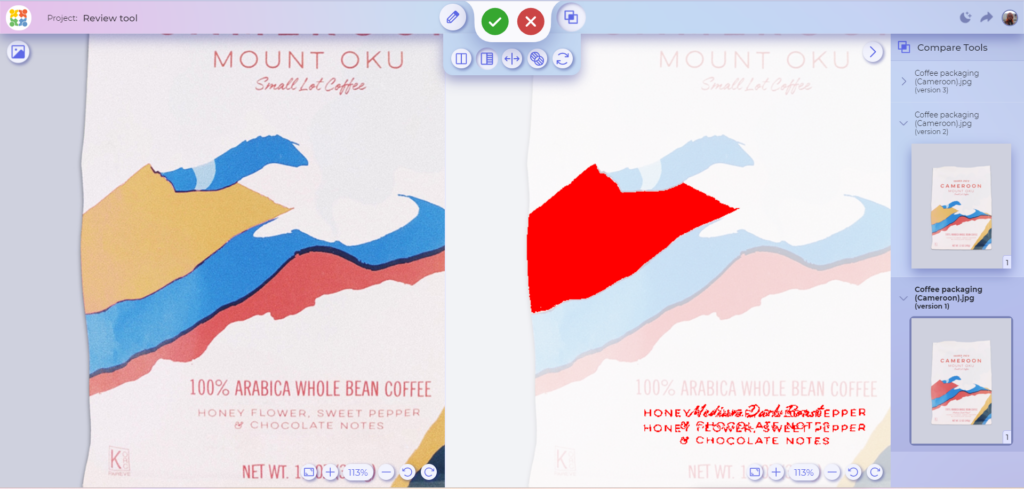
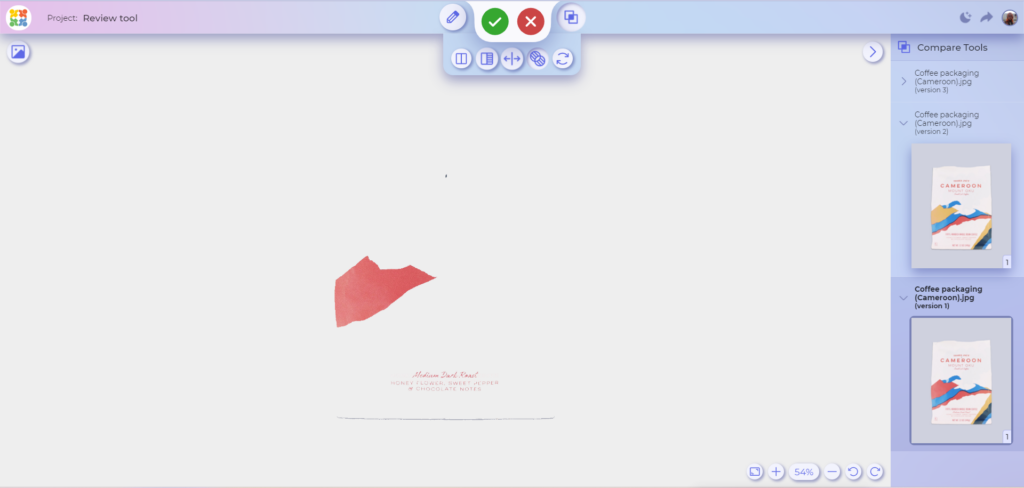
The next mode is called Fader. This mode enables you to see the edits by simply dragging the slide. By default, it is set to highlight the difference between the two versions (you can see what it looks like in one of the pictures in the gallery). And with each movement the picture changes from version to version.
The third mode Difference – is for all the hardcores out there. With its help, you see only the most important part cut out of the mockups – the difference. Zoom in or out to spot any tiniest variations from the previous cycle (whether they were wanted or unwanted).
And the fourth – one of my favorite ones. This is the best tool to make a fast scan to spot some significant changes. By changing the images quickly Toggle helps to see some inconsistencies between versions which you will need to inspect.
However, in my opinion, in order to ensure quality, you should use all four. To assess the level of completion and get a general impression, I personally would start with Toggle and Difference. Then, using Side by Side, I’d annotate every benefit and drawback of the more recent version. Lastly, I’d make sure I’m right using the Fader.
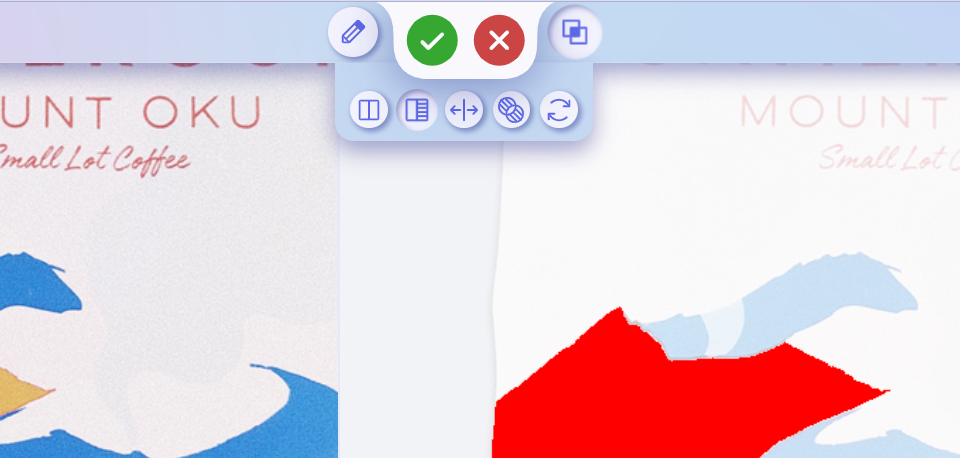
Decision buttons
Have you finished your annotations? Perfect! Use the green Approve and red Request Changes buttons at the top of the page to let the designer know what you’re thinking. But keep in mind that occasionally to finish the client approval process you will need to justify your choice or check off a few boxes to make sure you have done everything you should. Do not worry if you realize you forgot something; you can easily return from this menu and complete your task.

Conclusions
It has always been a difficult task to deal with the deep waters of the design process, requiring a challenging mix of qualities. The hallmark of design success is the arrangement of these elements into a melodic symphony, whether it is through continuous creative workflow, the knowledge of experienced designers, or the use of the best project management software.
The introduction of the cutting-edge review tool from Approval Studio stands out as a beacon of transformative potential in this dynamic environment. It serves as a response to the last criterion, providing an appropriate solution that neatly handles the difficulties of design approval. So, if you feel like this is the kind of software you need for your future success, make sure to use Approval Studio, and we will ensure a flawless review and approval process.
Cheers!
