 TEAM SOLUTIONS
 WORKFLOW SOLUTIONS


 REVIEW TOOL
 PROJECT MANAGEMENT
 TOOLS & INTEGRATIONS
 CLIENT INTERVIEWS


The packaging design process itself is a challenging ride, let alone adding consistent testing to it. Quite overwhelming if you ask me, but highly crucial. I love to think about design testing activities as a way of regaining control over mistakes and errors because you give yourself room for evaluation and analysis. And by working on those mistakes, you ensure that you provide the best possible experience to the customer with proper packaging design.
What is packaging design testing? Why is it important?
Packaging design testing is a process of evaluating the design performance of the product packaging, including its performance, visual appearance, and accordance with standards. This is undoubtedly a crucial part of the design process because, during package testing, you perfect your product by eliminating mistakes (like spelling errors or wrong barcodes) and backing up your decisions with actual data & research insight (without the generic “I like it this way better” opinions).
According to the research, 72% of consumers base their purchase decision on the packaging of the product itself, and 67% are also influenced by the materials used. Naturally, when buying and searching for a gift, package design becomes even more important, impacting 81% of customers (Source: IPSOS Packaging Research).
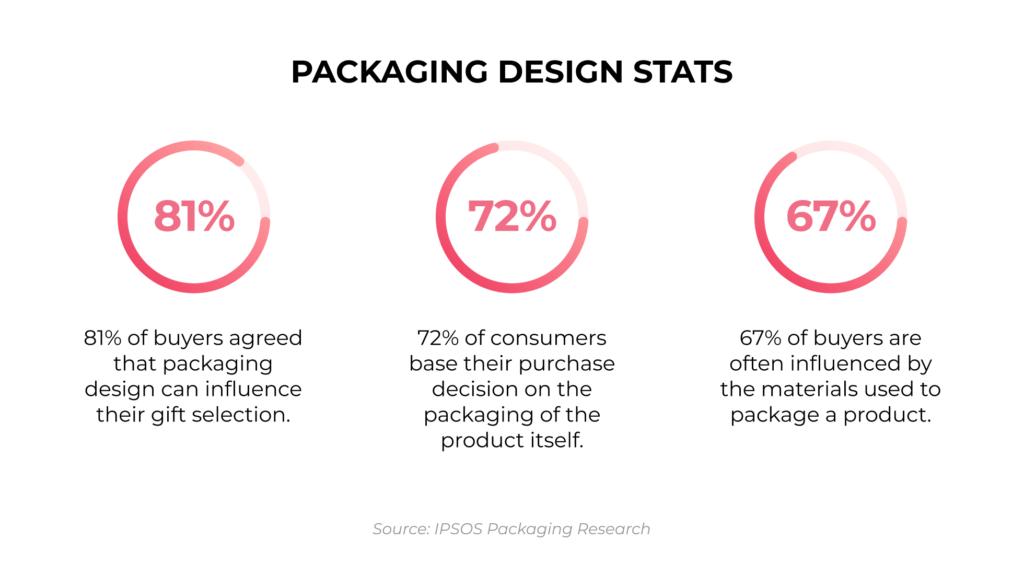
These statistics support the need for proper packaging and appealing design if you want to get the attention of the consumer majority (who wouldn’t want to do that?), especially the ones that haven’t tried your product before. The proper way of making sure you are putting your best packaging out on the market is not only by designing itself but also by testing your package design.
Let’s say, you created the most stunning visuals for the cosmetic product, the colors work wonders, and illustrations help the packaging stand out on the shelves. Well done! However, you decided not to go for design testing & proofing (for whatever reason you might have) and just sent the work in for mass production. Somewhere along the project workflow, you find some spelling mistakes here and there, the information structure seems confusing, and, in general, you find a few annoying oversights that could have been fixed before ordering a huge batch that would just go to waste. Quite frustrating, I know, and this is one of many examples of how package design testing can help you save time and money in the end, even though it feels counterintuitive because you spend some of those resources on testing as well!
Packaging design standards and regulations
An important part of packaging testing (and also the most boring one, if you ask me) is its accordance with standards and regulations. Even though the majority of information in these documents relates to physical property testing (like the integrity of packaging materials or its ability to protect goods from various environmental conditions), there are also enough rules that influence the package design (labeling requirements, nutritional info, etc.).
Here’s a list of regulations in some of the countries that might be useful:
- US Food & Drug Administration — Labeling Requirements
- ISO (International Organization for Standardization) Requirements — Packaging and distribution of goods in general
- UK Government Guide — Packaging (Essential Requirements) Regulations
- EU Labeling regulations — General Marks and Labels, Food Labelling and Nutrition
- Canada — Guide to the Consumer Packaging and Labelling Act and Regulations
- Australian Consumers Law — Resources and guides
Please make sure you approve your package artwork with legal advisors according to your country’s law and regulations in your specific industry (food, pharmaceutical, etc.).
How to conduct packaging design testing properly?
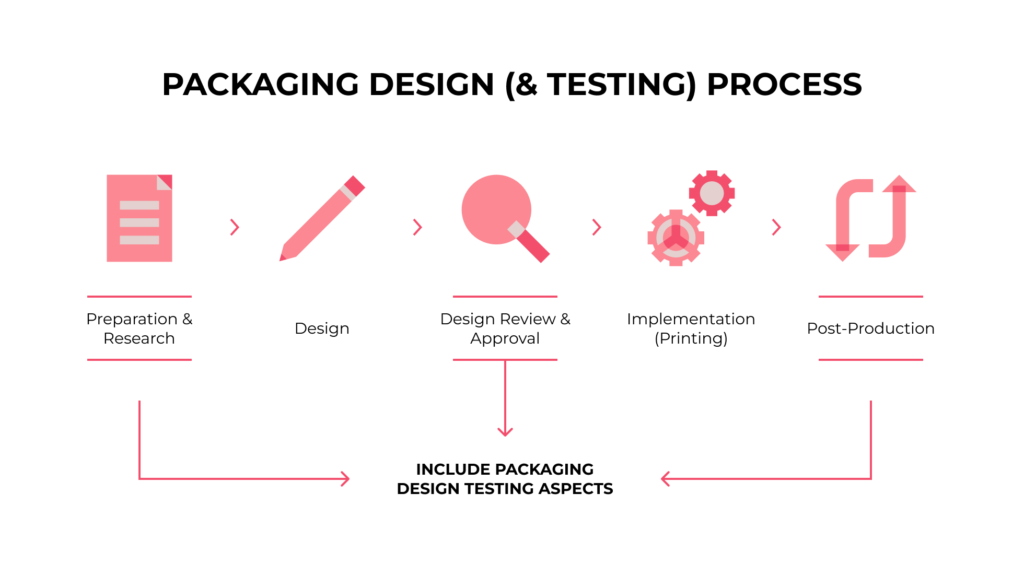
Now let’s move to the process of design testing, which is actually interspersed in various stages of product packaging design. I’ve broken the process down into three steps, starting with pre-design research, then polishing everything during internal and external design review, and ending with post-production analysis.
Step #1: Preliminary Research & Idea Testing
Preliminary research is a process of gathering relevant data and making a pre-design analysis. This might include investigating already existing packaging options or your previous designs, surveying your target audience, or evaluating the market.
How does this relate to design testing if I don’t have a final design yet? Well, testing your ideas and brainstorming possible solutions to a problem is already part of design testing, as it evaluates the ideas in the early stages of development. During this part, you would look into what’s working and what doesn’t base either on external research or your own investigations. Let’s say you have a pool of ideas that you would like to try out in your package design, you can narrow them down by conducting simple audits of the shop conditions or online screening of your target audience and their pain points.
Also, this is a step where you would go back to the insights that you gathered in the post-production analysis (more details on this in step number 3) and work out the best ways of including those changes in your current design. You could view this as a loop of package design, very common in enterprise-level companies that have enough resources to both conduct research and make frequent changes to the design.
Step #2: Internal & External Design Review
Now, moving to the stage where you’ve already have your design nice and ready. What should one do to test it? The most known options are proofing the design by yourself and then within a team (or with a client).
While testing the design by yourself, I would first advise you to take a break from it, as we tend not to notice minor mistakes when working on that one image for a particularly long time. Then, you could go through every aspect of your packaging design (text, imagery, positioning, information structure, etc.) one by one, paying close attention to details as well as to the overall appearance.
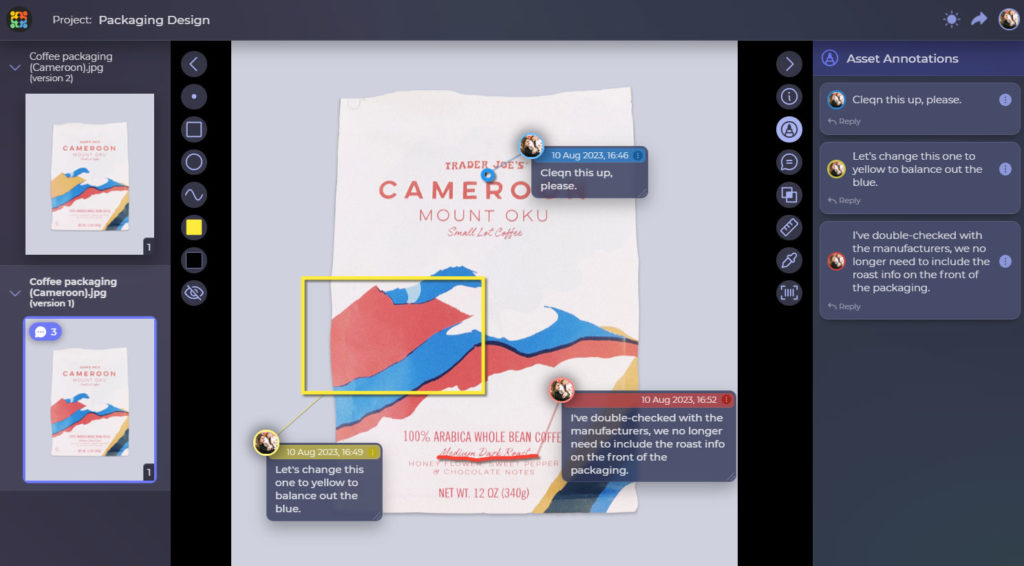
As for the external design review (inside the team or with the clients), there are a few options you can work with, namely proofing designs through emails or/and messengers or using specialized design approval software. We prefer using online proofing tools as they streamline the artwork review process and provide users with helpful features, like on-screen annotations or compare modes. Another example is the spellchecker or barcode scanner features that are available in Approval Studio and crucial in the packaging industry.
During this step, you can also run test prints to test the design’s color, font readability, object placements, and overall look on the 3D object. This measure helps you feel confident that everything works as expected (for particularly anxious people) and gain a new perspective on the design as you can now see it in real life and not only as a picture on the screen. Also, during test prints, you might find unexpected errors (like that one file in the bunch that wasn’t converted to CMYK, and now all of the colors are wrong) and fix them before everything goes to mass print.
Step #3: Post-production Analysis
The project is live, and you’ve got your product on the shelf — congratulations! This might look like an end to the whole packaging design testing process, but it actually is not if you are looking into ways to improve later on. During this stage, it’s important to evaluate how the product did on the market. Is there any insight on what can be improved?
Generally, some form of post-production research or analysis is done to gather these insights and data. For example, observational research in the store, behavior data research (heatmaps), customer interviews, competition comparison, etc. Here’s another great option — to conduct a packaging design survey by using online survey solutions.
Regardless of which methods you are using, it’s important to take into account that there are multiple factors that influence the customer’s decision at the same time, some of which are subconscious. So great analytical skills are a must in this stage of packaging design.
…and now the cycle is complete!
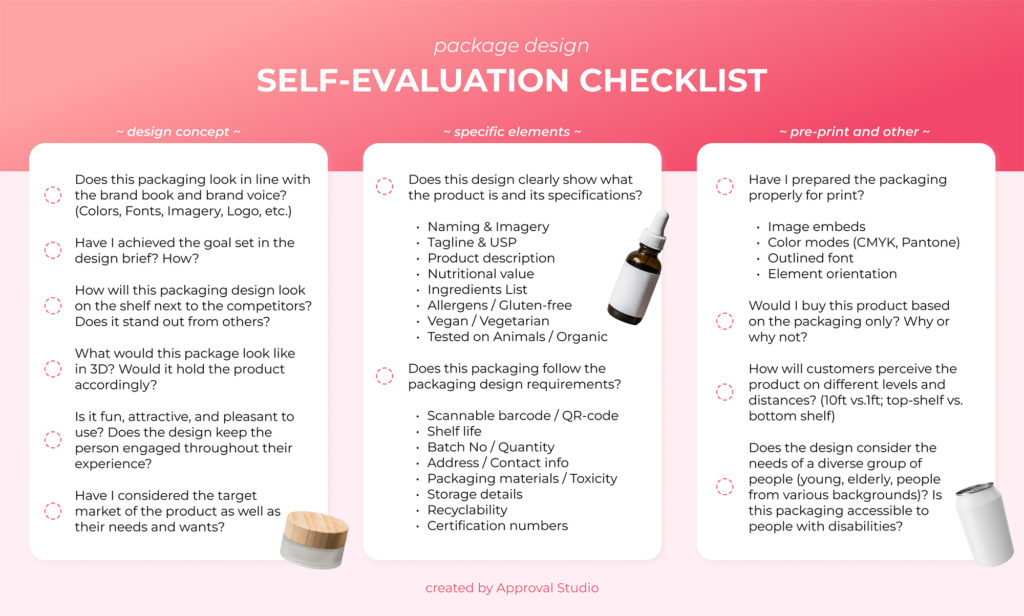
Depending on your business needs, there might be more or fewer steps, especially after trying several routines and picking parts that work best for you. What I would advise is keeping a checklist of things that you need to go through before submitting your design. This would help with keeping everything on track, even those tiny details that usually slip your mind.
Here’s what I would look for while self-assessing my package design, so feel free to use this checklist as a starting point and alter it to your needs if necessary:
Common mistakes in package design testing
Regardless of how great of a professional one can be, no one is safe from making mistakes. With the pursuit of having a “perfect” packaging design, a lot of people will go through a problem-solving process, and I would like to pinpoint some common errors in packaging projects and solutions to them.
Mistake #1: Forgetting about packaging clutter.
Yes, packaging design clutter is a thing, and it’s not about the abundance of various packaging designs on the shelves. This actually concerns the clutter on the individual packaging, where information is not well-structured, there’s just too much text that looks like a blob with no particular definition, and it’s hard for the customers to easily find what they need (like ingredients list or nutritional value).
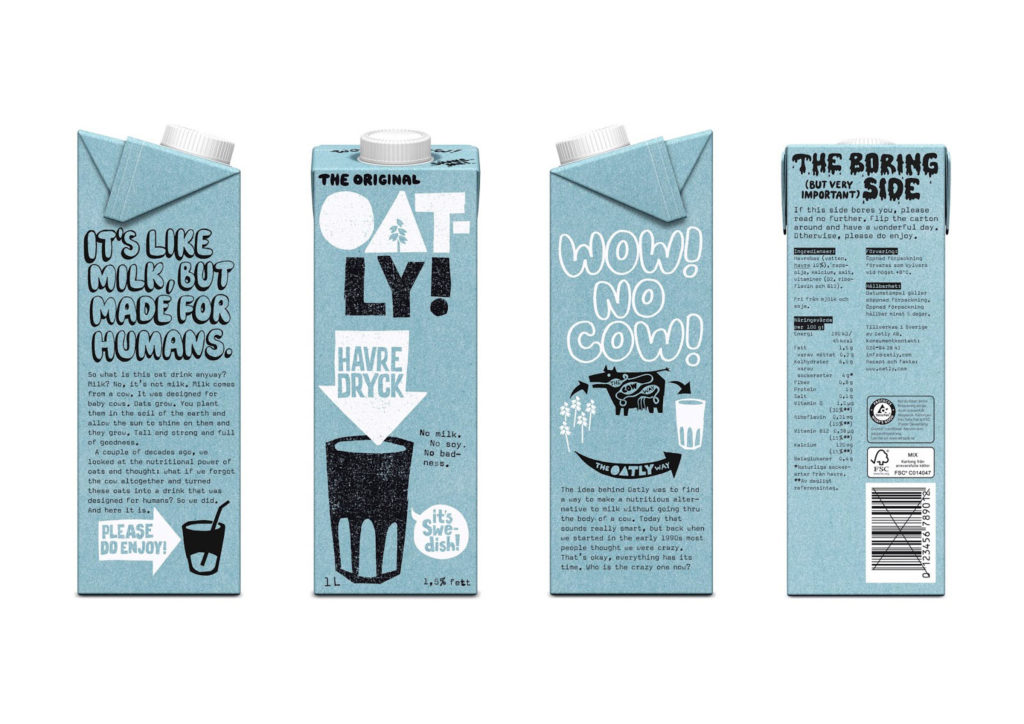
Solution: Include no more than three main blocks of information on the packaging front (like brand name/logo, product name/description, and a visual representation /illustration/photo). Then I would advise creating a clear structure on the back. A great example is a creative Oatly solution to the “boring side” of the packaging (that cannot be omitted due to the standards, obviously). They included all of the needed information and specifications in a neat, clear-to-read way, divided into the proper section.
Mistake #2: Sinking into the biases.
As human beings, we are extremely prone to making biased decisions automatically as these feel like a safe option to our subconsciousness. Unfortunately, it ends up not being the best option for product design testing as it leads to wrong results, especially during the research and analysis stages.
Some of the common biases are confirmation bias (specifically looking for evidence to prove your hypothesis, ignoring other results), primacy bias (easily recalling the information you encountered first, forgetting to include everything else), and implicit bias (acting on the basis of subconscious stereotypes and prejudices).
Solution: Being actively aware of possible biases is already a big step, especially when paired with thorough analysis skills. So double-check your evidence and evaluate whether your design solution is backed up by a range of diverse data. Also, consulting others helps eliminate subjectivity and brings a fresh perspective to the design.
Overall, it may be said…
…that packaging design testing is not an easy one-step process, but it is certainly a vital one in product development. By conducting design testing, you are actively working on creating a better solution and, what’s most important, a solution that works well with customers based on valuable data.
