 TEAM SOLUTIONS
 WORKFLOW SOLUTIONS


 REVIEW TOOL
 PROJECT MANAGEMENT
 TOOLS & INTEGRATIONS
 CLIENT INTERVIEWS


Howdy, folks!
How was your last week? I have to admit, ours was pretty hectic! The whole team was running ‘round, getting ready for a new release, and trying to do their best to add some cool new features that we hope you will find useful.
Sometimes the tempo of our lives gets somewhat crazy, really, and we can find ourselves working at the most unlikely time and places. For example, once my colleague was sitting at the dentist’s with his mouth wide open when there came a notification with a request to urgently check a support ticket – what a cruel, cruel world! I myself got caught with such requests, though, usually, it happens in the evenings when I’m chewing the fat with my chums over a pint of beer… Well, you get the point. We all often have to work on the go as the whole civilized world does in 2020.
We’ve been facing these situations for some time and we know for sure that our users face them as well on a regular basis. The design industry develops very quickly, due dates become tighter, and your proofing workflow has to be compact so that you can finish everything on schedule. That is why the mobile version of Approval Studio proofing tool was merely a question of time.
Mobile Artwork Proofing Step by Step
So, what exactly do we have on the table, how does it work, and what can you do with it? Before we answer this question, I recommend you try everything yourself right after you finish your reading.
Ready? Let’s dive into the basic mobile artwork workflow.
Step 1: Getting started

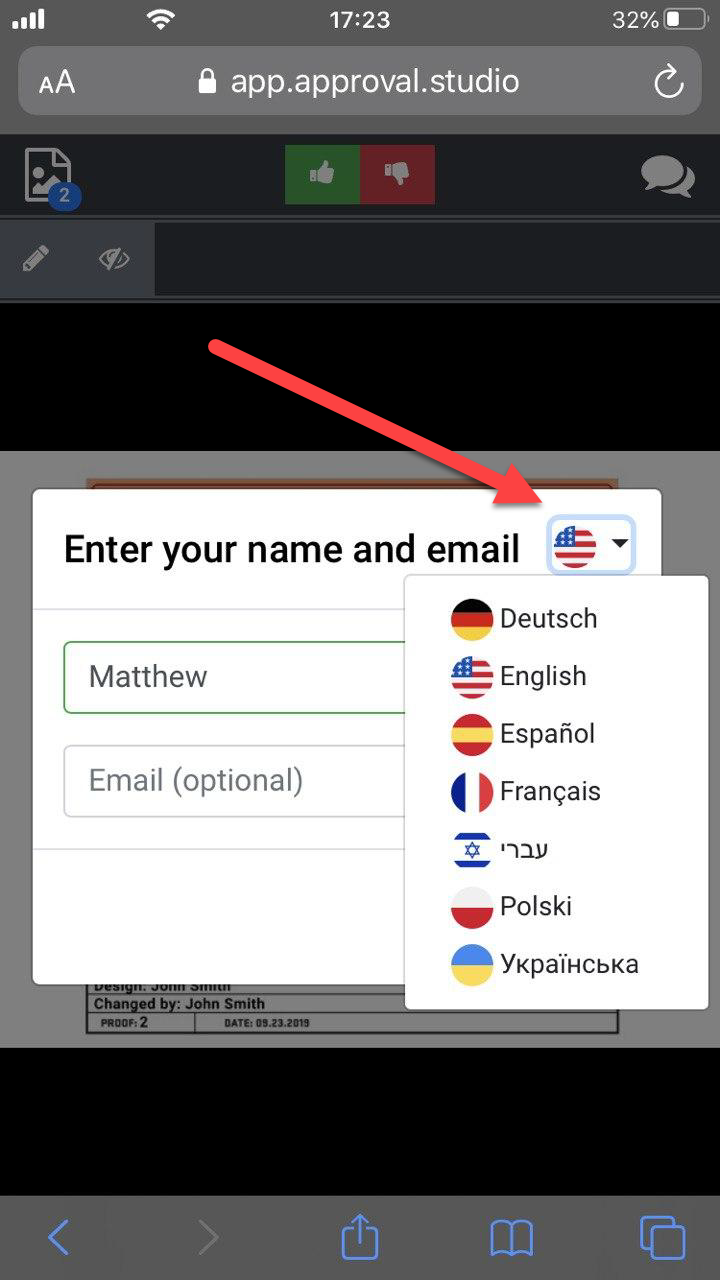
The first thing that you see when you click the link that was shared with you and go to your mobile browser is the field for name and email. A small reminder: it does not mean that your external user registers in the system, it is only for identification. It helps the project owner establish who exactly annotated and accepted or rejected the artwork. Fields are optional, though: you can just enter some numbers there if that’s fine with you.
The next thing is the language choice. Approval Studio has a few localizations that are chosen individually for each user, and all of them are available in the mobile version. There is not much of text interface here, but it might still help if you work with a multinational team. When you have finished with the identification and language, you will see your file and mobile interface of our digital proofing software.
Step 2: Versions
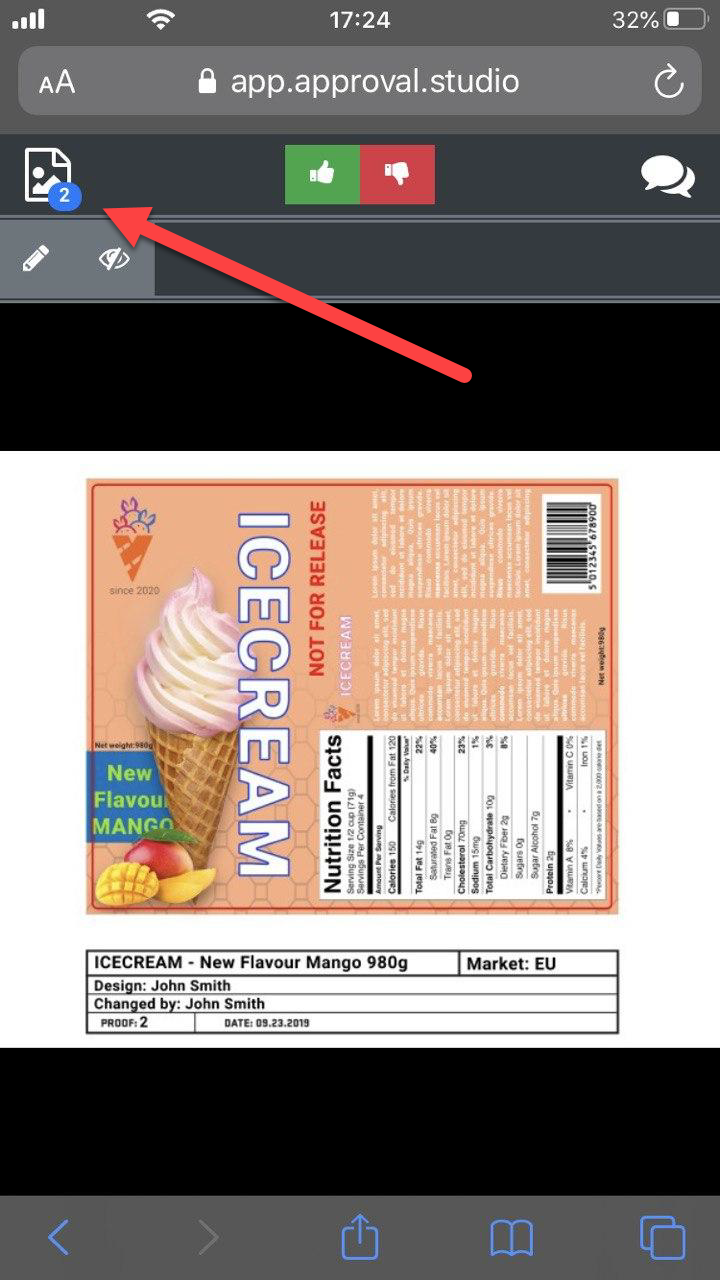
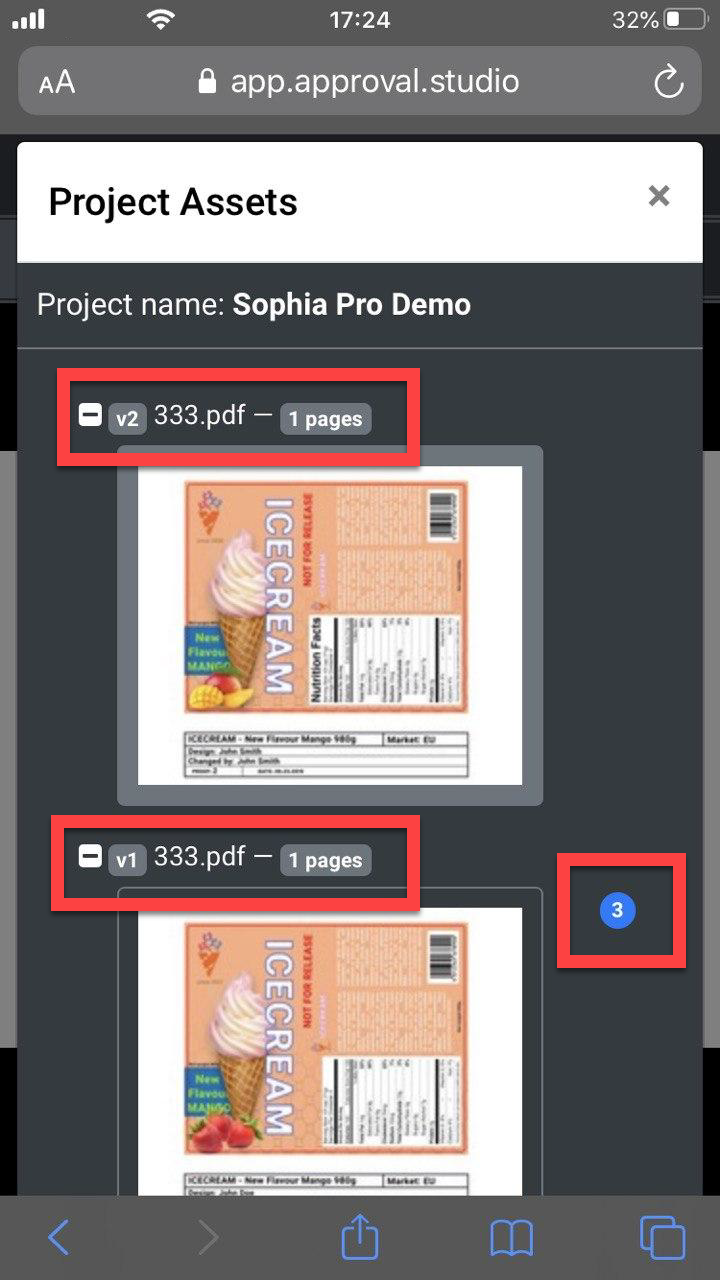
The first thing you can check is the number of versions available for the artwork. To do that, click the file version button in the left upper corner and open the Project Assets menu. You will see all files’ thumbnails and their versions available within the project. Note, that the version number is indicated to the left of the file name; the number of pages is to the right.
If a certain version of the file has some previously added annotations, their quantity will be visible to the right of the artwork thumbnail itself. To continue our mobile proofing journey, let’s switch to the version 1 of our file.
Step 3: Rotation and zooming
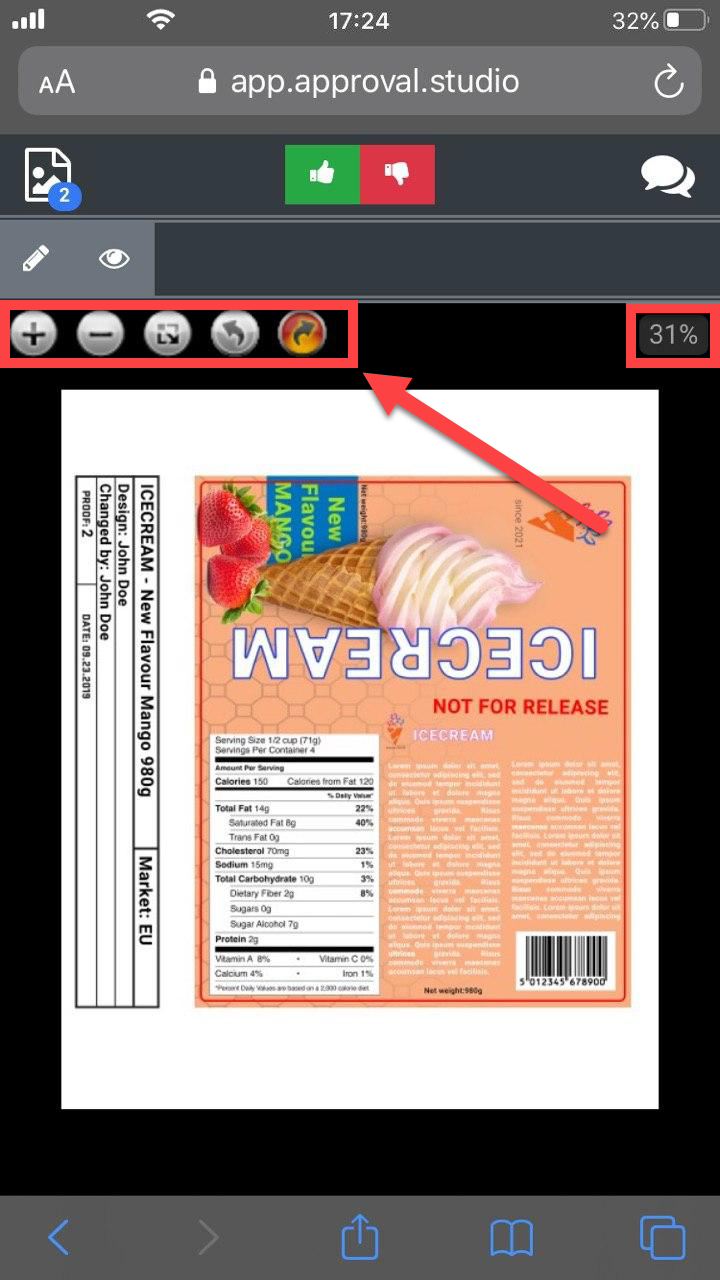
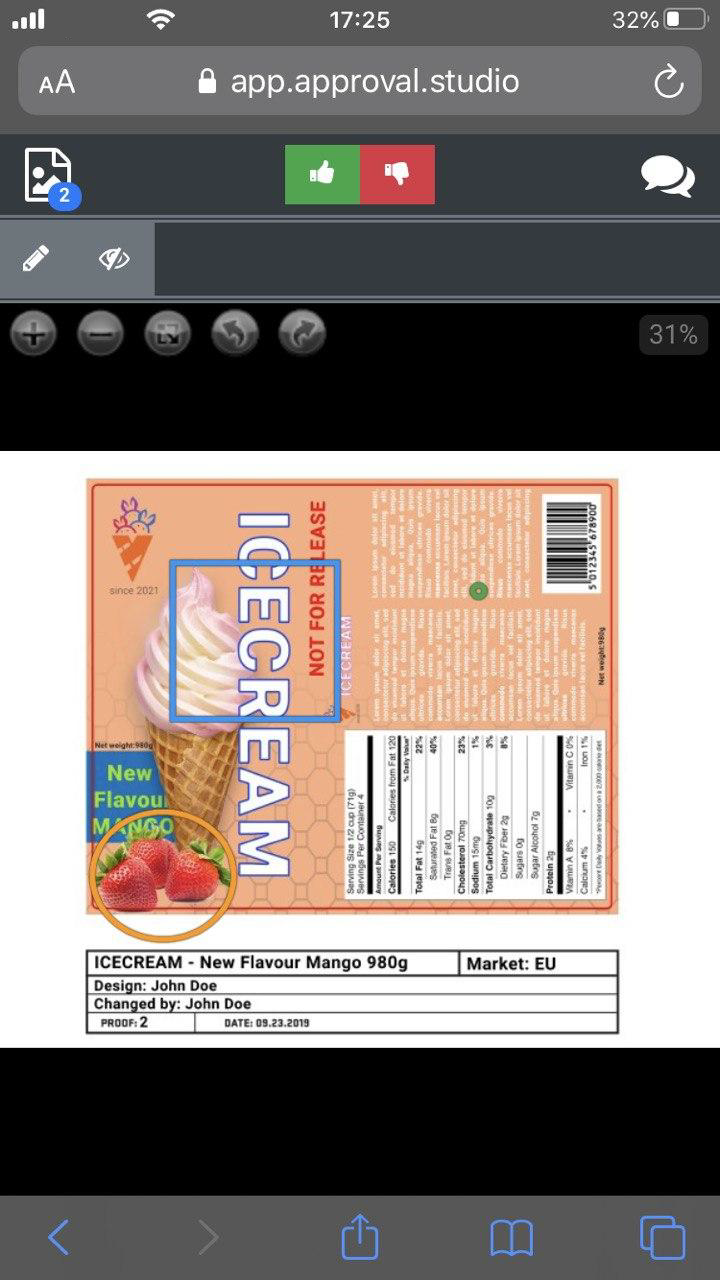
Okay, so we have switched and turned off our notifications for a sec (a trick I’ll tell you about a bit later). If you tap on the artwork, the file position panel will appear. You can see rotation buttons there – in the screenshot to the left, I’ve just rotated the file to the right so that I could check the text written on my package. Seems it’s some kind of Elvish, I can’t read it…
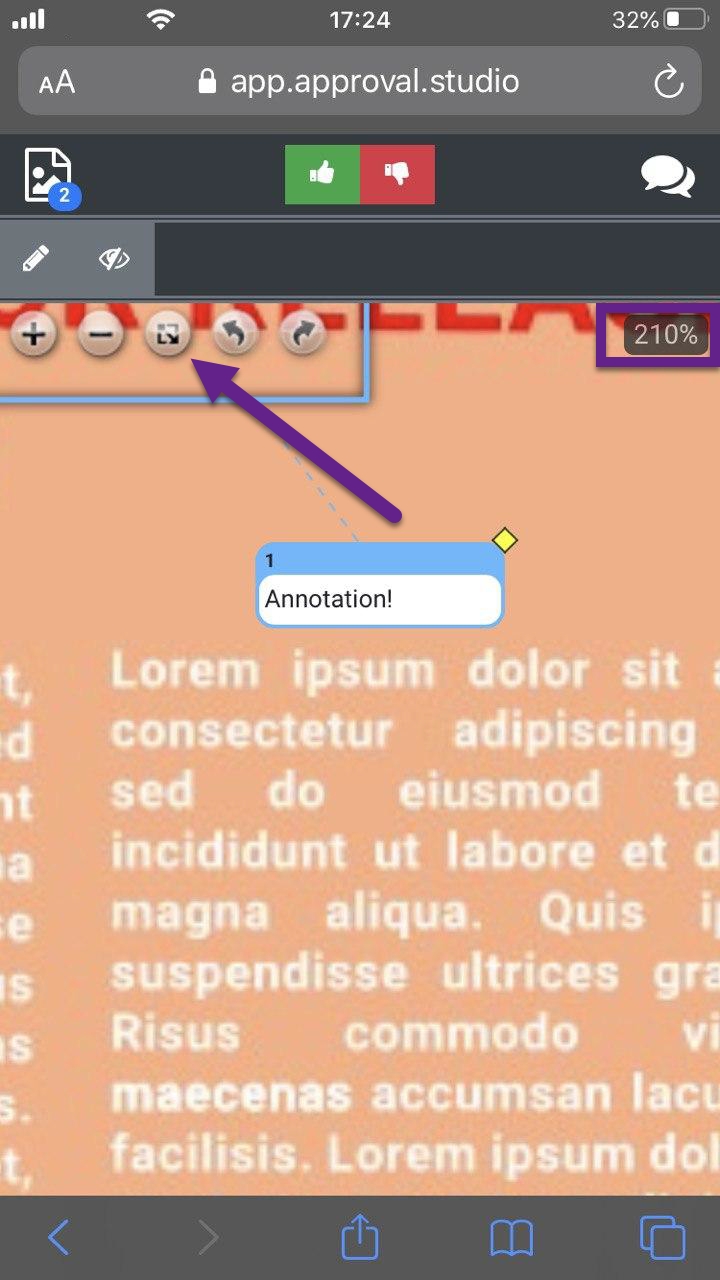
I believe that zooming might help in such case. These “+” and “-” buttons allow you to zoom in and zoom out accordingly; pinch zooming is also available on your mobile. Turns out it’s just this lorem ipsum text… pity, I kinda hoped that would be Elvish, but nevermind. The important thing is that you can see the text clearly – Approval Studio does not lower the quality of your image for the sake of speed even in the mobile version.
In the upper right corner, you can see how zoom percentage changed from 31% to 210% and the text still remained totally readable. One more interesting thing is that when you zoom in, comment boxes (I’ve turned annotations on already) shift their sizes as well for your convenience.
Now, let’s press the Fit Screen button in the middle of our position panel and get back to our 31% to play with annotations a bit.
Step 4: Annotations
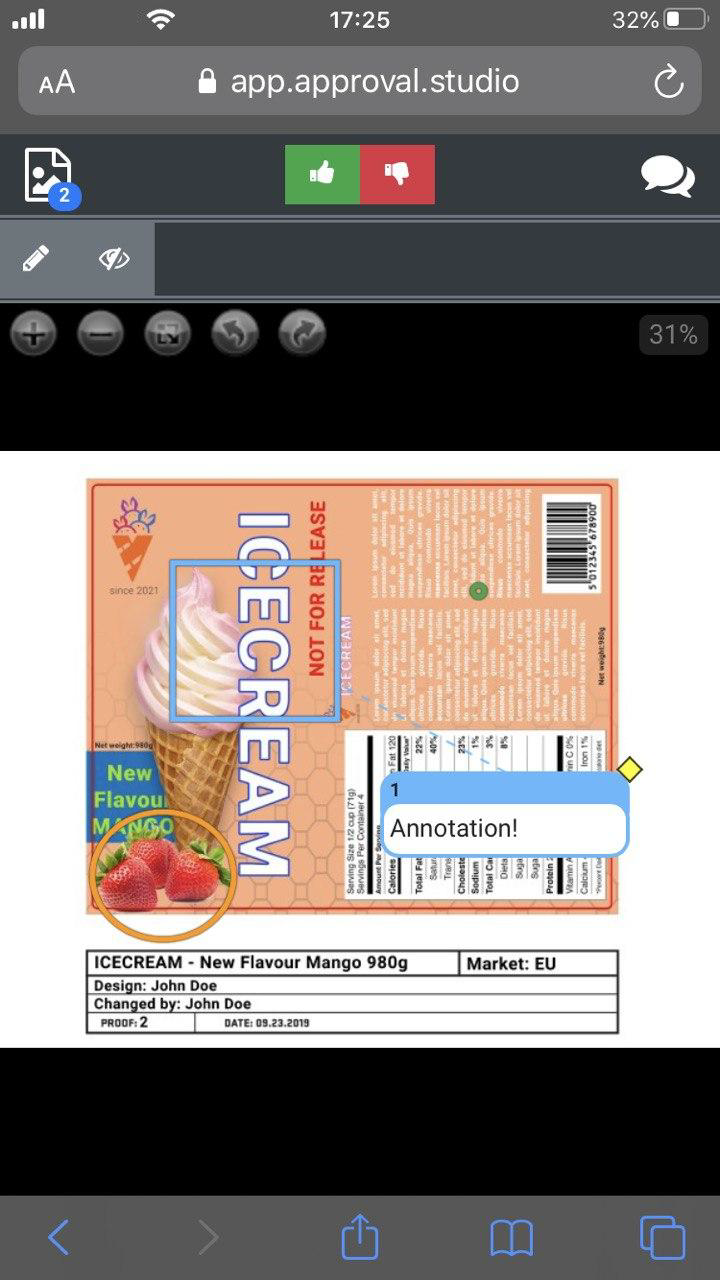
When turned on, annotations are being shown without comment boxes – to see them, tap on the annotation. The comment box and the text will appear in the size comfortable to read. You will be able to change the position of the comment box if it covers the area that you need to check. To hide the comment box, tap on the annotation again.
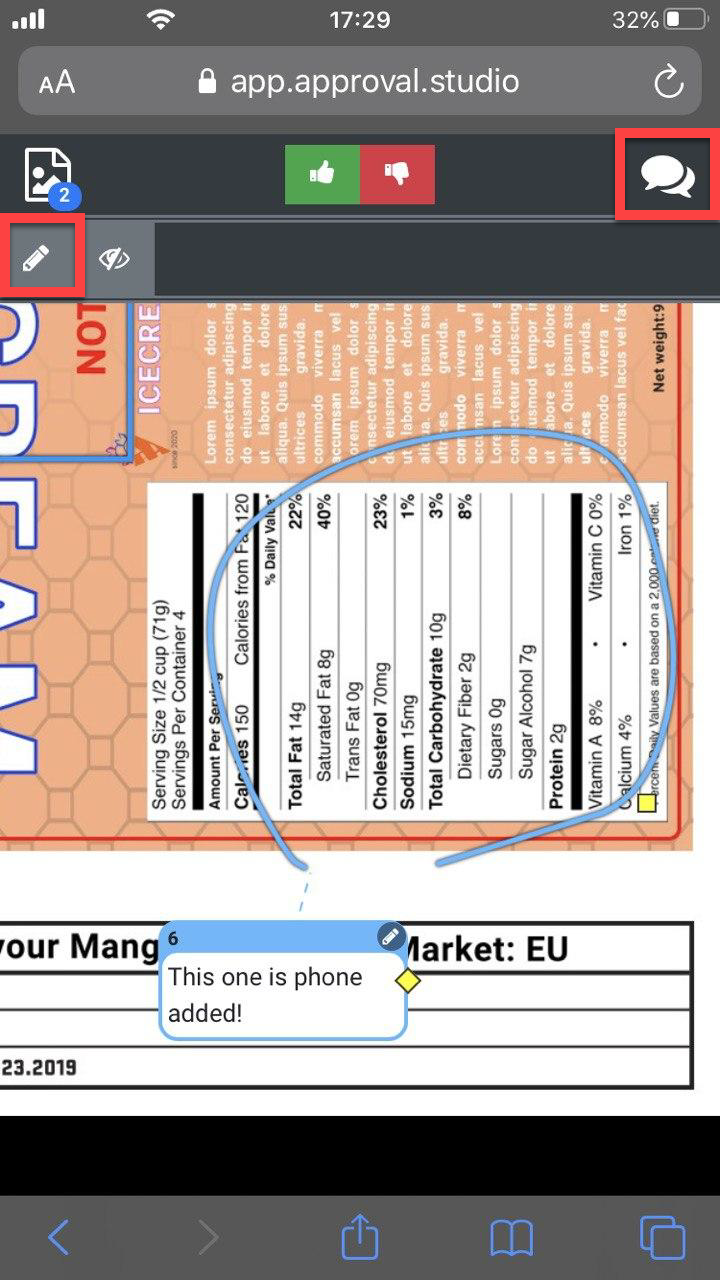
Let’s zoom again and try to add an annotation from the phone. Find a pencil icon, tap on it, and draw a shape around the area that you want to comment on. Mobile annotations are added via the free form, which means you can draw it on your own – it is the most convenient way to annotate the artwork via your phone. After you’ve drawn the shape you needed, release your finger and the comment box will appear where you will be able to enter the needed text. When you’re done, you can to resize your annotation or comment box tapping on the yellow square next to them. Mind you, only resize – not redraw! If you want to tie the same comment to another area, tap on the pencil icon on the comment box.
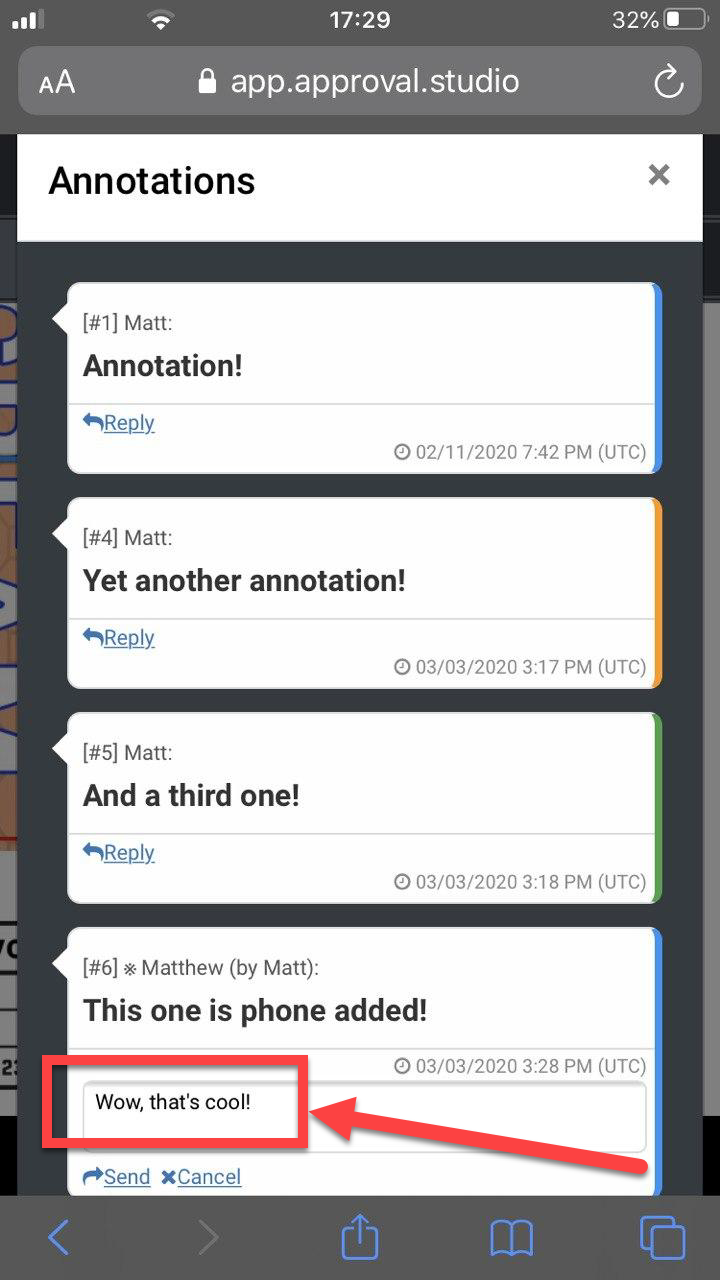
In the upper right corner, there is an icon that opens the comment panel where you can check texts of all annotations at once. In order for you not to mix them up, they are marked with colors and numbers. Also, this panel includes the name of the reviewer and the time and date when the annotation was made. As you can see, the annotation that we’ve just added appeared in this panel instantly – the mobile version is totally online as well as the desktop one, which means that you can participate in the review sessions together with your teammates.
Also, you can reply to the comments using the Reply button. A small tip: if you’ve entered the text but want to make sure you got everything right and check the artwork again, you can close the annotations panel, see the artwork once again, and then come back and reply – the text will be saved in the response window.
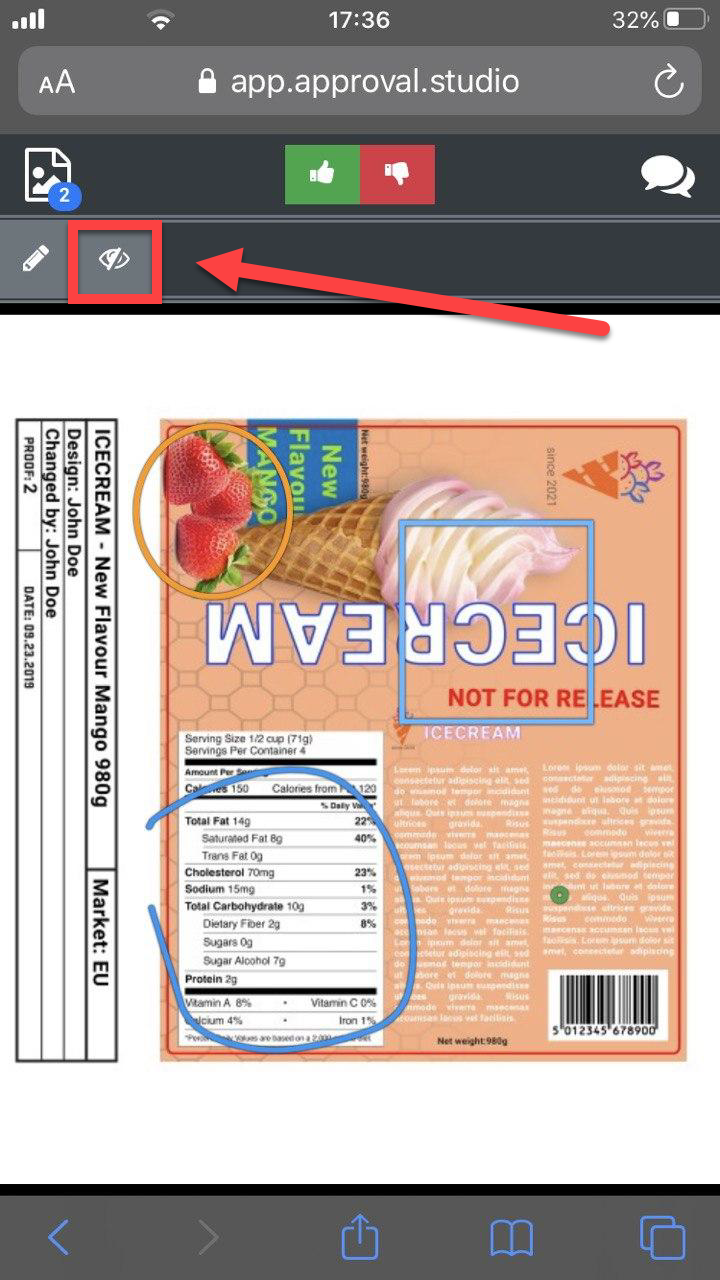
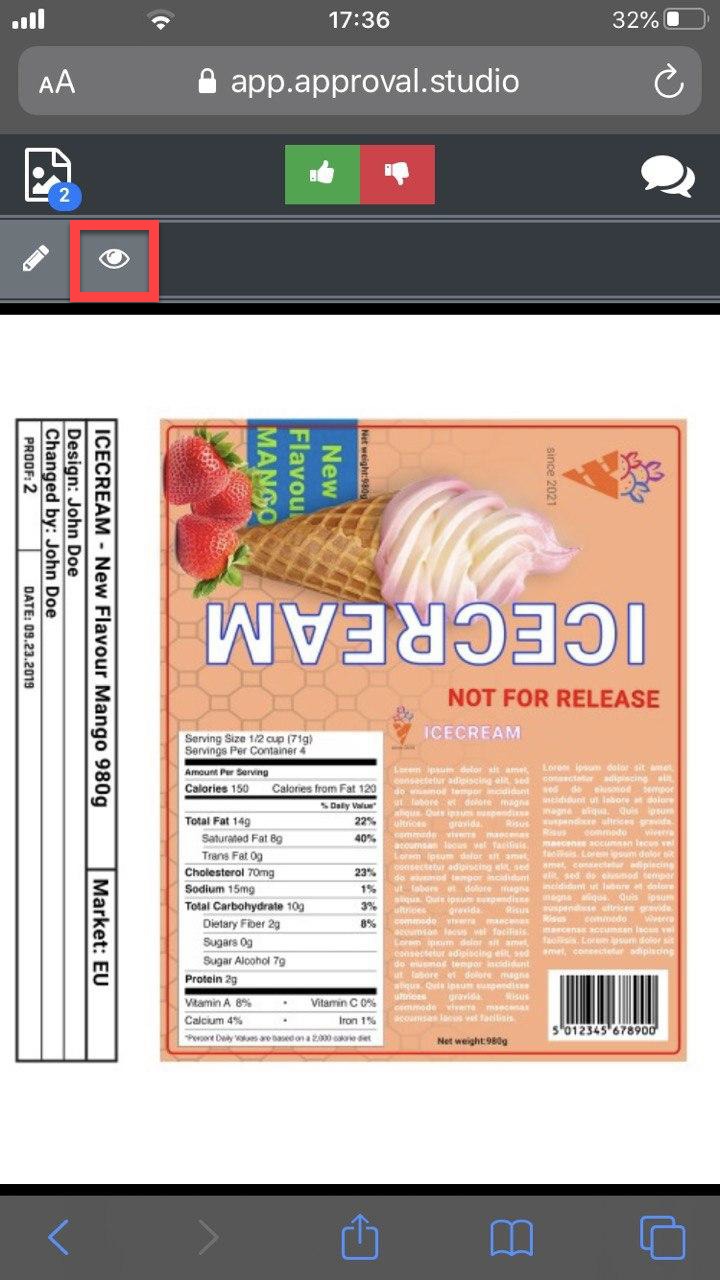
Finally, we are getting to the feature of our artwork software I’ve been teasing you with since the beginning of the article. Next to the pencil, there is a Hide/Show annotations button. You can use it whenever you need to check the artwork without any distractions to make sure you did not miss anything. When you are done, tap the same button again to see the annotations.
Step 5: Approve/Request Changes buttons
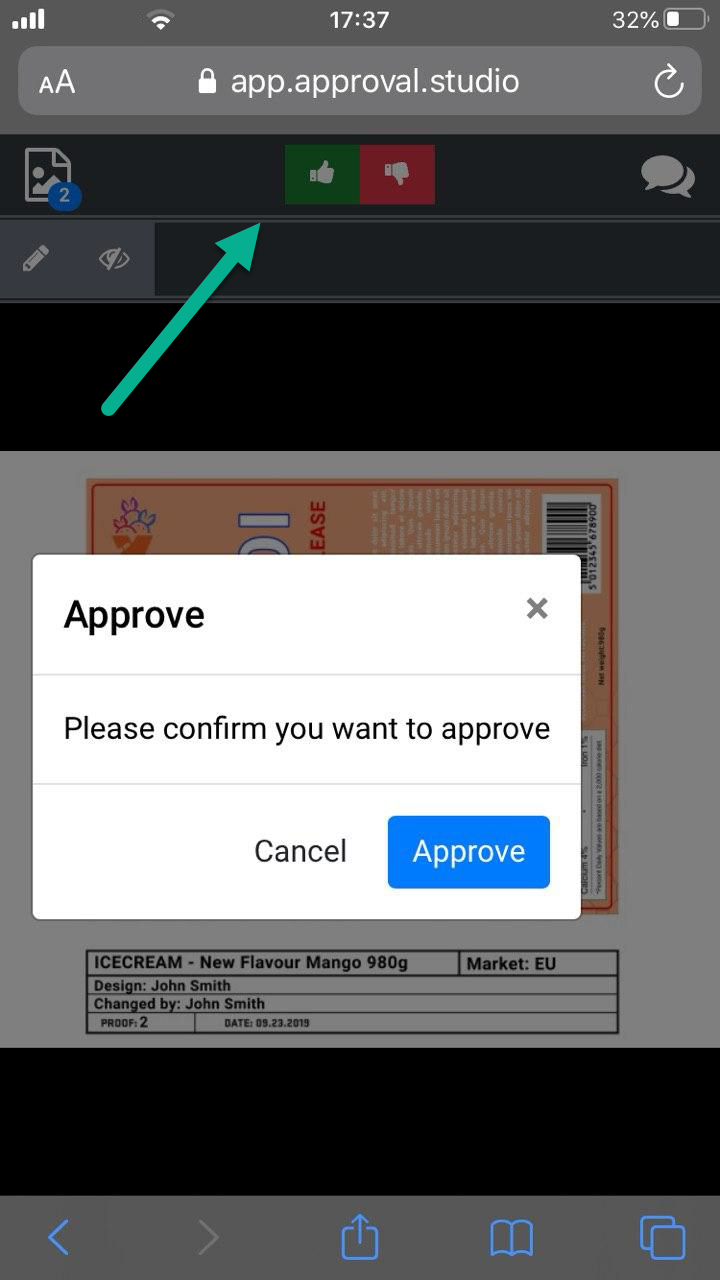
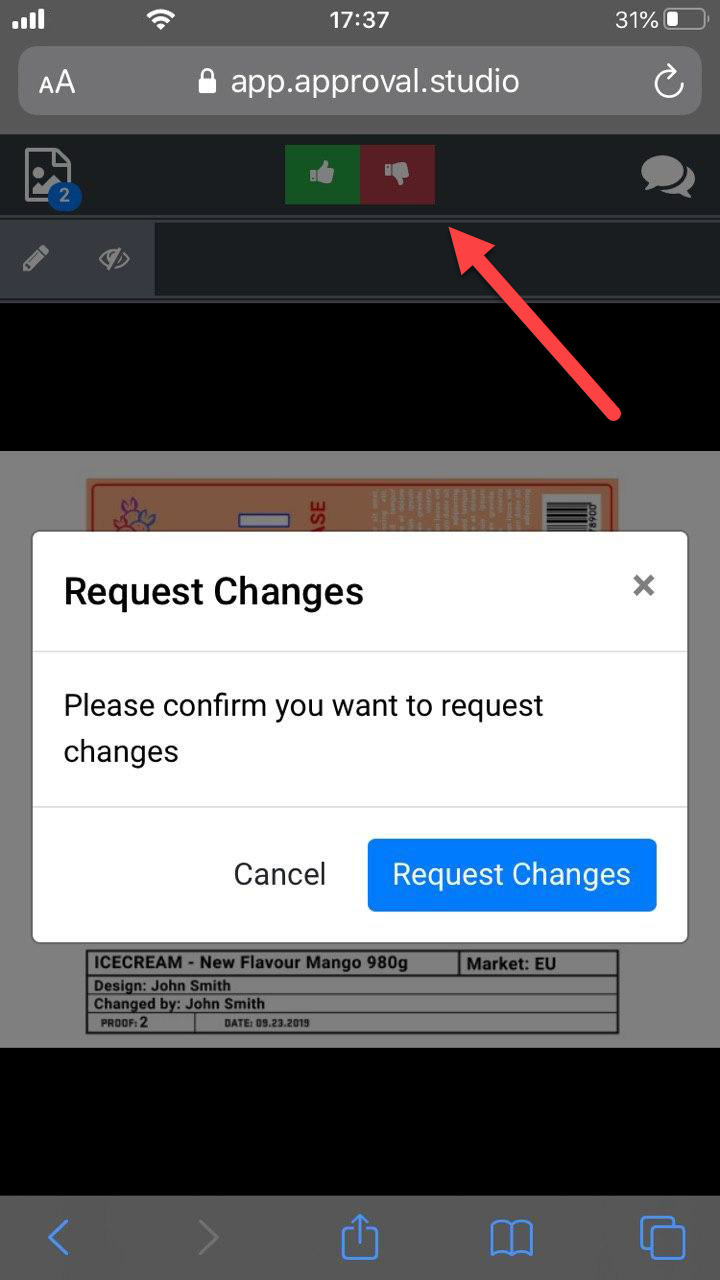
Ok, so now we are done with our review – all versions are checked, all comments are made, and we are ready to give our final verdict. You can see both Approve and Request Changes button above your artwork. If you have made your decision, tap the one you need. You’ll get a confirmation message that can be either standard as the one you see in the screenshot or customized if the project owner decided to change it in the settings. Warning: after making your decision on the file, you will not be able to add any other annotations or pass your verdict again, so be attentive!
Video Tutorial
Congrats, our test artwork review is done! However, if you have missed something or need to visualize everything you’ve just read, we prepared a video tutorial for you that can be found on our YouTube channel. Hope you’ll find it helpful!
Final Thoughts
With the huge pace of the modern world and design industry in particular, on-the-go reviews can hardly surprise anyone. It is a usual process that repeats itself quite often, so having a possibility to review the artwork when you are far from your office is an absolute must. Approval Studio team has worked hard to make our online proofing tool as flexible as it is, and we will surely continue to do so! We are always happy to help you, so let us know if you have any suggestions or think that we missed something!
