TEAM SOLUTIONS
 WORKFLOW SOLUTIONS


 REVIEW TOOL
 PROJECT MANAGEMENT
 TOOLS & INTEGRATIONS
 CLIENT INTERVIEWS


Post is also avalible in:
![]()
![]()
![]()
A conversation between a custom print shop owner and an Approval Studio Project Manager
Hi, my name is Andrew, and I’m the Project Manager at Approval Studio. If you’re using our system, you probably know me — I’m the person who usually conducts onboarding sessions, demos, and interviews. Over the past eight years of developing Approval Studio, I’ve had well over a thousand of those conversations.
One of the most common things people ask about is how to get their own clients to actually start using a review tool. Years ago, the challenge was convincing design studios that a problem existed at all. Nowadays, the vast majority of people who contact us already understand what a review tool is and why they need one. The real question has shifted: it’s no longer “what is this?” — it’s “how do I get my clients to use it?”
Recently, I had a conversation with one of our clients — the owner of a custom print shop — about exactly this issue. Unfortunately, I didn’t receive permission to publish the full transcript, as it included a lot of individual details. But I had a recording of the call, took notes, and used an AI tool to turn that conversation into an article. What you’ll read below is a reconstruction of that real conversation, with all personal details removed. I hope you find it useful.
Interviewer: Custom Print Shop Owner
Guest: Approval Studio Project Manager
The Problem: Too Many Channels, Zero Control
Print Shop Owner:
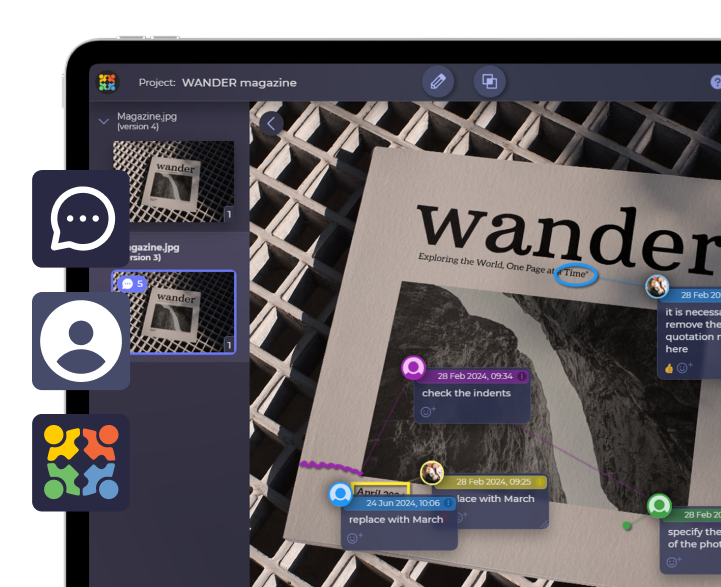
We run a custom print shop, and like many businesses in this space, we constantly deal with mockups, revisions, approvals, and client feedback. On paper, using an online proofing tool sounds like the perfect solution. But there is one big concern that always comes up: many of our end clients have never used a review tool before. They’re used to email, phone calls, screenshots, and random messages on WhatsApp. One client literally sends me photos of printed screenshots with handwritten notes on them. I’m not joking.
The real problem is I can never tell what the current status of a proof is. My designers ask me “did they approve this?” and I have to dig through three different apps to find the answer. And sometimes the client says “oh, I told your manager on the phone last Tuesday” — and we have no record of that anywhere.
So my question is: how do you set up Approval Studio in a way that makes your clients’ clients actually use the system?
Approval Studio Project Manager:
The first thing to understand is that this should never be approached as “how do we make people use the system.” That mindset is already slightly off.
The real goal is to show them the advantages of using it. Because usually the issue is not that people are unwilling — the problem is that they’re simply not familiar with this type of markup tool, and they don’t realize that the way they’re used to giving feedback creates problems on the business side.
When they send comments through email, messengers, phone calls, or scattered notes, it may feel perfectly normal to them. But for the print shop, it creates chaos: missed feedback, unclear approvals, extra revision rounds, and delays.
So the task is not to push them into a system. The task is to create an experience that is so clear and simple that they immediately understand two things: what you want them to do, and why this way is better for everyone.
Step 1: Write an Invitation Email That Actually Explains What You Want
Print Shop Owner:
So where does that start? What’s the first setup step you usually recommend?
Approval Studio Project Manager:
Step one is always the invitation email.
When we have our first onboarding meetings with a new client, one of the first things we set up together is the custom email template that gets sent to their customers whenever a mockup is ready for review. This is a very important part of the process, because this email becomes the first interaction the end client has with the review workflow.
And this email should do one very specific job: explain, in very simple language, what the client is expected to do. It should not be long, technical, or overloaded. Something along these lines:
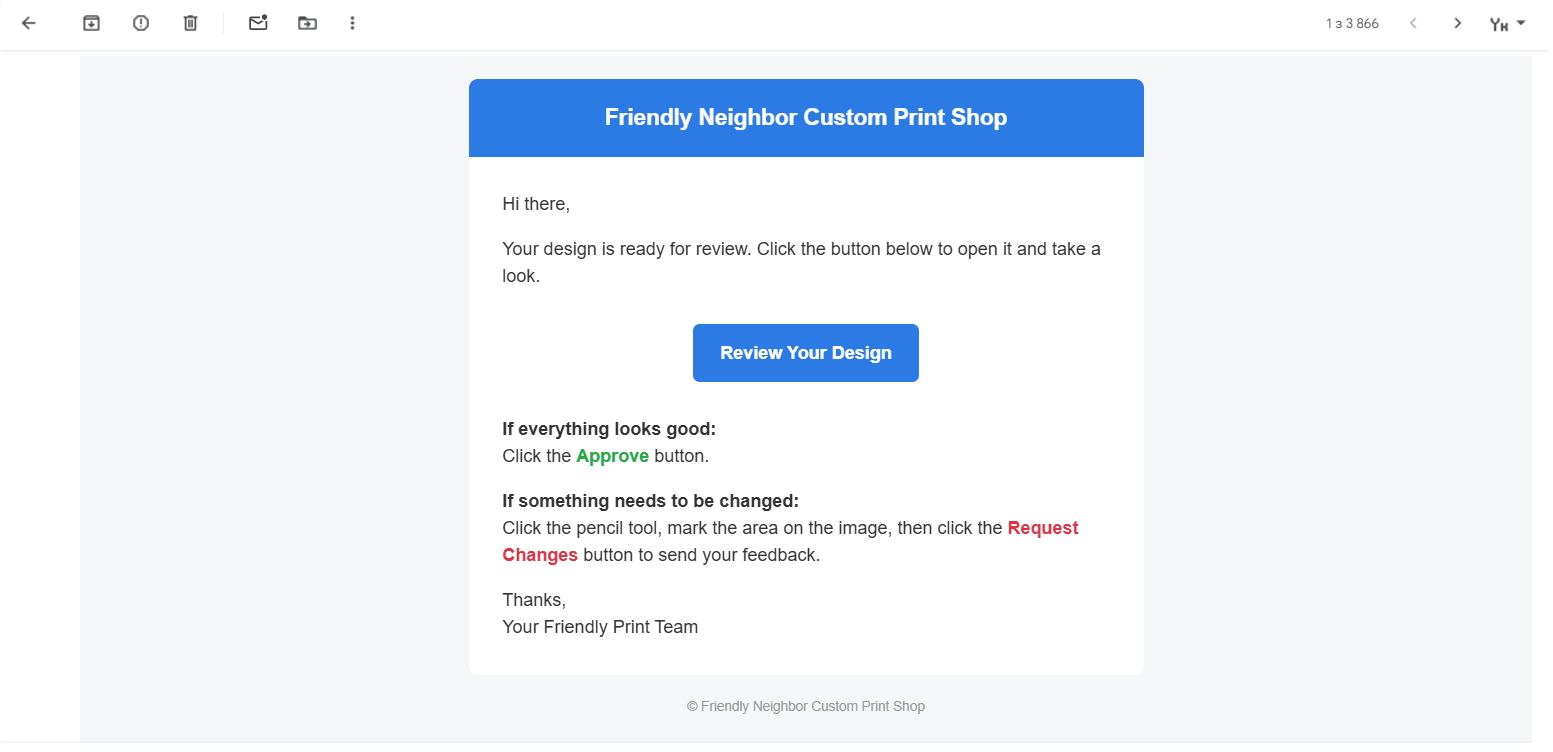
“Your design is ready for review. Please click the button below to open it.
If everything looks good, click the green Approve button.
If something needs to be changed, click the pencil tool, mark the area on the image, and then click the red Request Changes button to send your feedback.”
That is the kind of language people understand immediately. You are not teaching software. You are giving simple instructions.
My personal rule: write it in a way that even your parents would understand what you want them to do and why. That is actually a very useful test. Would they understand what happens when they click the link? Would they understand how to approve something? Would they understand how to request changes? If not, the message is still too complicated. End clients don’t want to study a system. They want a quick, obvious path to review and respond.
Step 2: Make the Email Look Like It Comes From You
Print Shop Owner:
That makes sense. But a lot of people don’t even read emails carefully. How do you make sure they actually pay attention?
Approval Studio Project Manager:
Great point — and this deserves its own focus: make the email appealing.
It’s not enough just to have the right text. If the email is plain black text on a white background with a block of instructions, many people will skip straight through it. They’ll go directly to the button without reading anything — or ignore the email entirely.
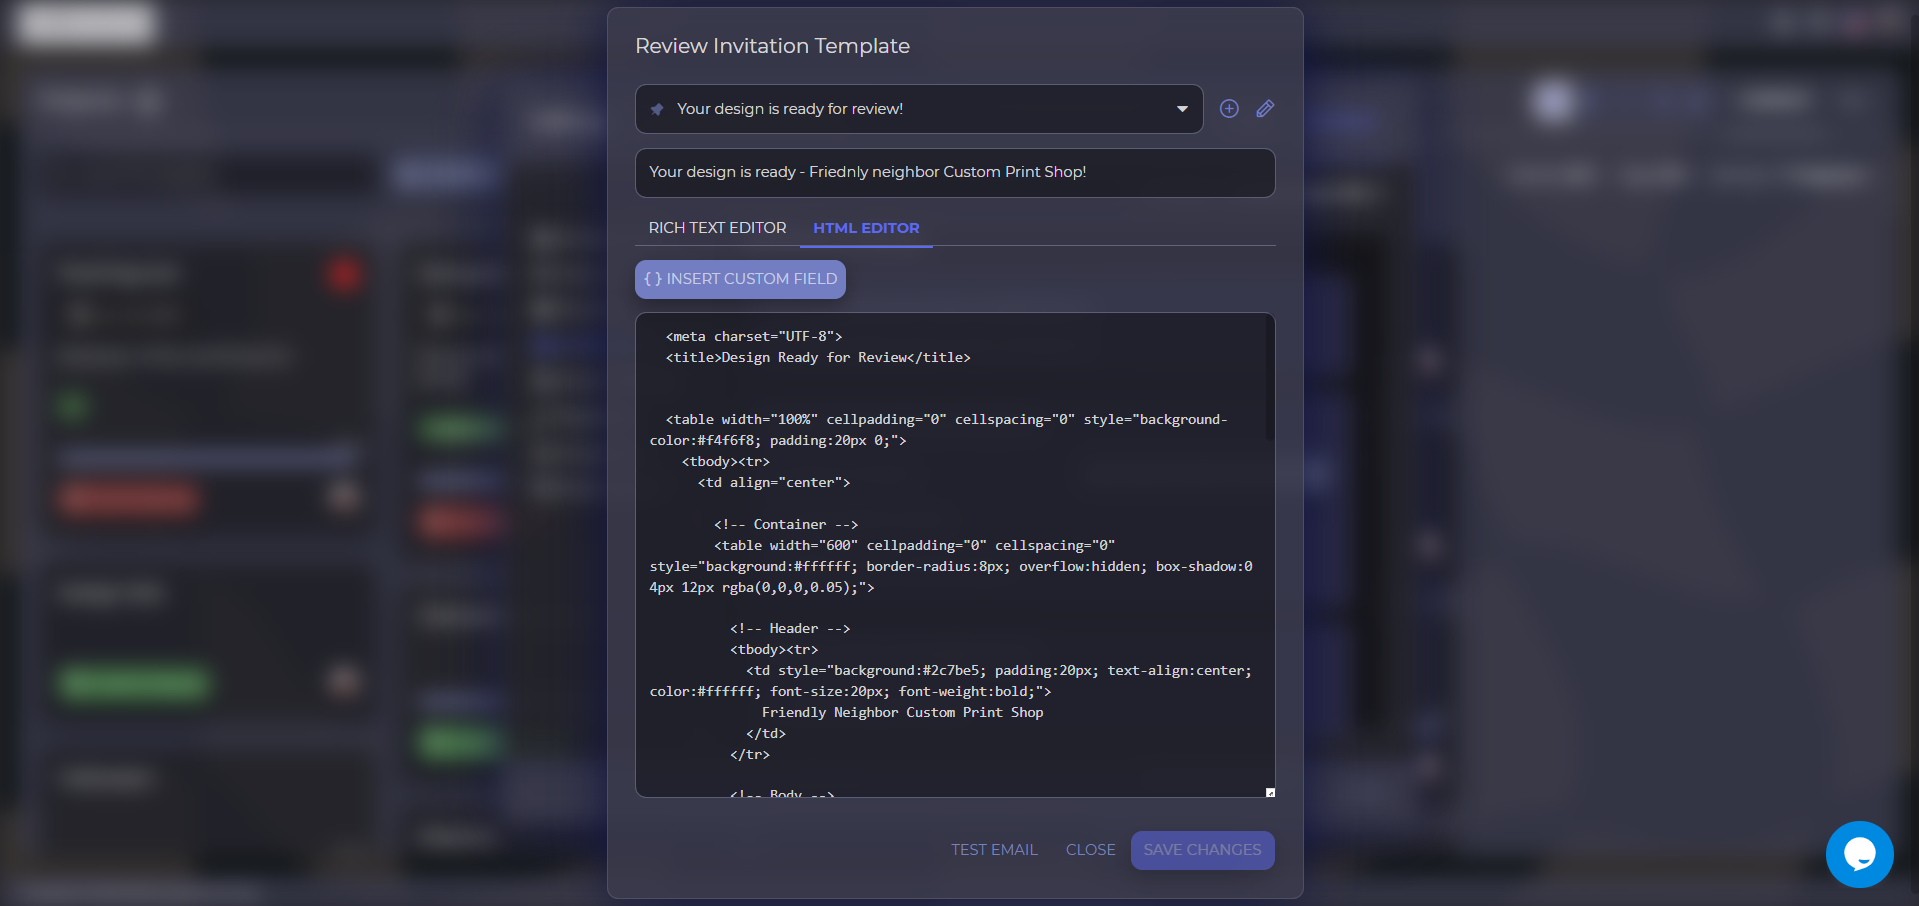
That’s why I always recommend using the rich text or HTML editor in Approval Studio to make the email visually attractive and properly branded. Use your logo. Use your brand colors. Make the call-to-action button prominent. Break the explanation into small visual sections so the reader can scan it instantly.
Today this is easier than ever, because you can use AI tools to help generate the HTML. Give it your text, your logo, your brand colors, and your style guide, and it will produce a polished branded email template in minutes. No developer needed.
You can also customize the sender name and the email subject line, so it arrives in your client’s inbox looking exactly like it came from your print shop. The client never needs to know Approval Studio is involved at all. The result is an email that feels like a natural extension of your company — not a system notification from some third-party tool they’ve never heard of. And that makes people far more likely to trust it, read it, and follow it.
Step 3: Use Simple Mode for New or Non-Technical Clients
Print Shop Owner:
Once the client clicks through from the email and enters the review page, what’s the next big thing to think about?
Approval Studio Project Manager:
The next step is reducing complexity inside the review tool itself.
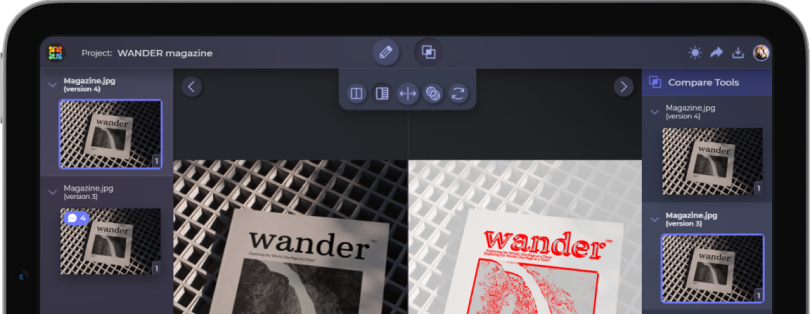
Approval Studio has a lot of functionality, and that’s great. There are many useful features in the review environment: measurement tools, a barcode scanner, spell checker, color separation, and more. These are incredibly valuable for internal reviews or experienced users.
But here’s the reality: when a new user opens the review screen and sees too many buttons and too many options they don’t recognize, it can scare them off. People who aren’t tech-savvy get lost very quickly. And the moment they feel uncertain, they close the tab and go back to email. That’s exactly what you want to avoid.
Print Shop Owner:
So how do you avoid overwhelming them?
Approval Studio Project Manager:
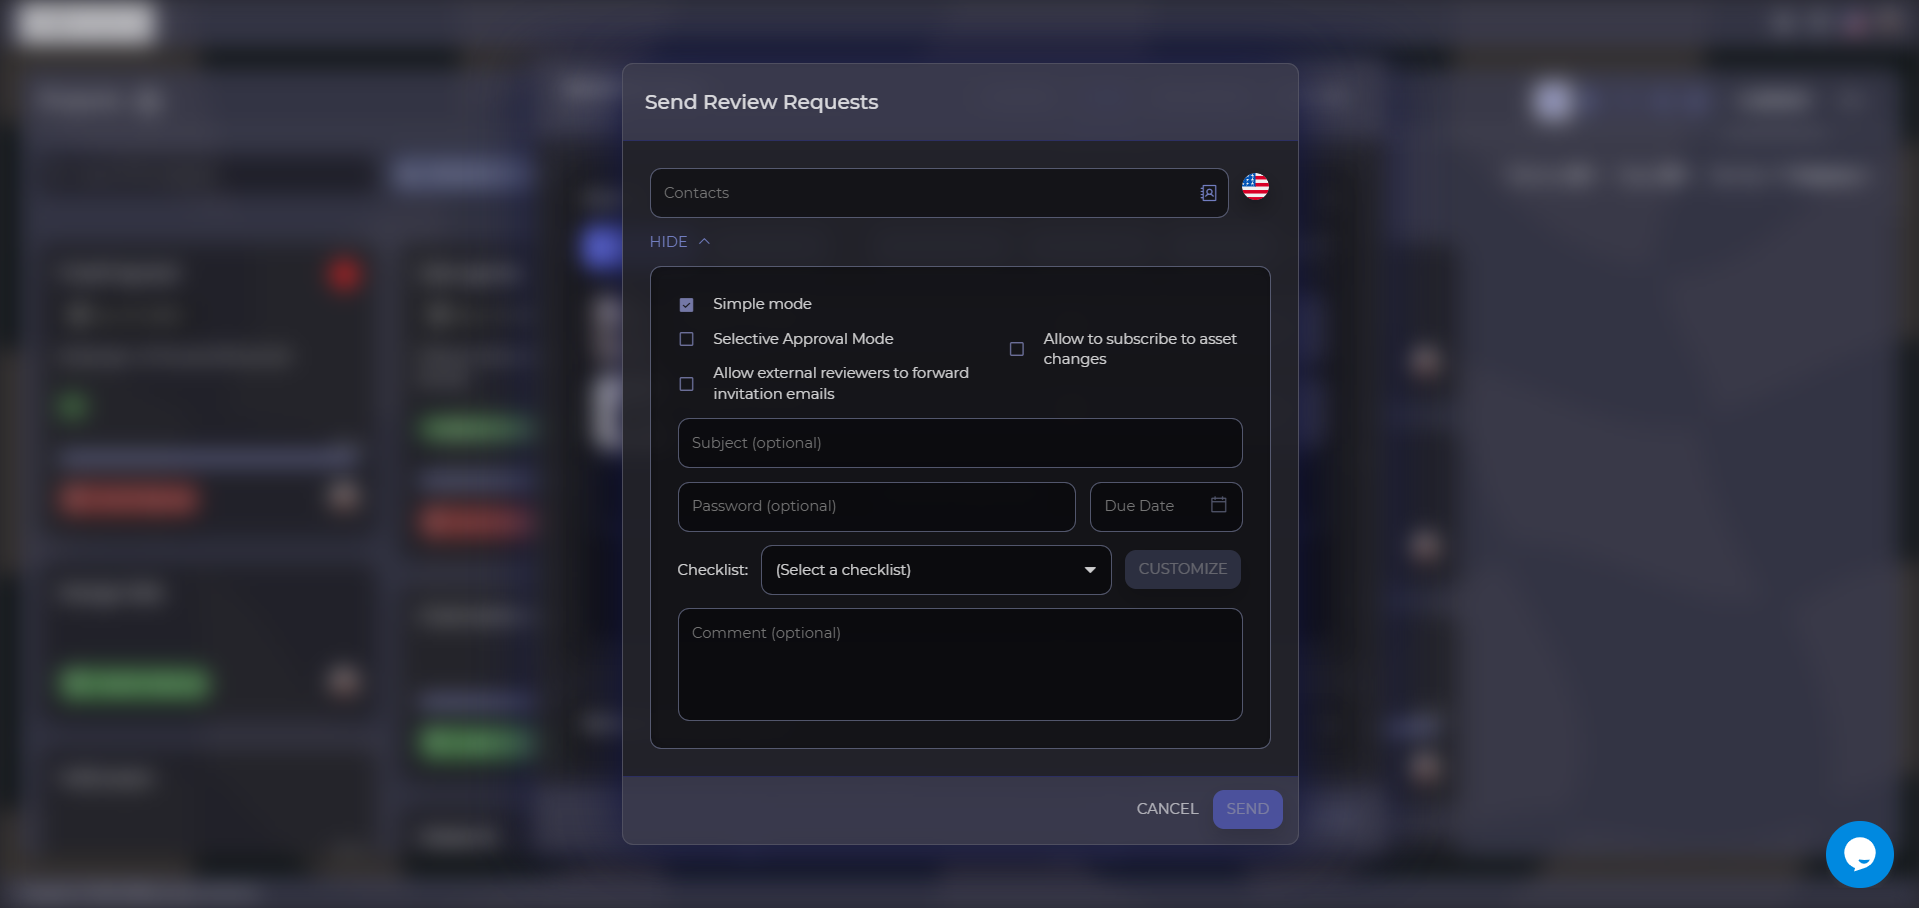
That’s where Simple Mode becomes very important.
For newcomers, or when you’re not sure how comfortable a client is with technology, Simple Mode is usually the right choice. In this mode, only the essential actions remain visible — just three buttons:
- Approve
- Add annotation
- Request changes
That’s it. No distractions, no confusion. They can open the design, mark what they want changed, approve it if it looks good, or request changes if it doesn’t. Nothing more than what you already told them to expect in the invitation email.
This creates a much smoother first experience. The person feels confident because the system is obvious. And that confidence is a very big part of adoption.
Print Shop Owner:
And what about advanced users, or the internal team?
Approval Studio Project Manager:
That’s the beauty of it. Simplicity for newcomers does not mean limitation for everyone else.
For your internal process, for returning clients who are already comfortable with the platform, or for those who genuinely need advanced quality control features, you can switch to the full mode. It takes seconds, and you can apply it per project or per user.
So it’s not about removing functionality from the system. It’s about showing the right level of functionality to the right person at the right stage. New users see only what helps them succeed immediately. Advanced users get access to more powerful tools when they’re ready.
Step 4: Close the Loop with a Success Message
Print Shop Owner:
Now let’s say the client has reviewed the file and made a decision. What happens next? Is there anything important there from the adoption perspective?
Approval Studio Project Manager:
Yes, definitely — and this is an area where a lot of businesses miss an opportunity.
You don’t want to leave people hanging after they take action. If a client approves or rejects a file and the screen simply closes without any context, they’re left wondering: did that work? Did someone receive it? What happens now? That uncertainty is exactly what pushes them to send a follow-up WhatsApp or call to double-check — which is what you were trying to avoid in the first place.
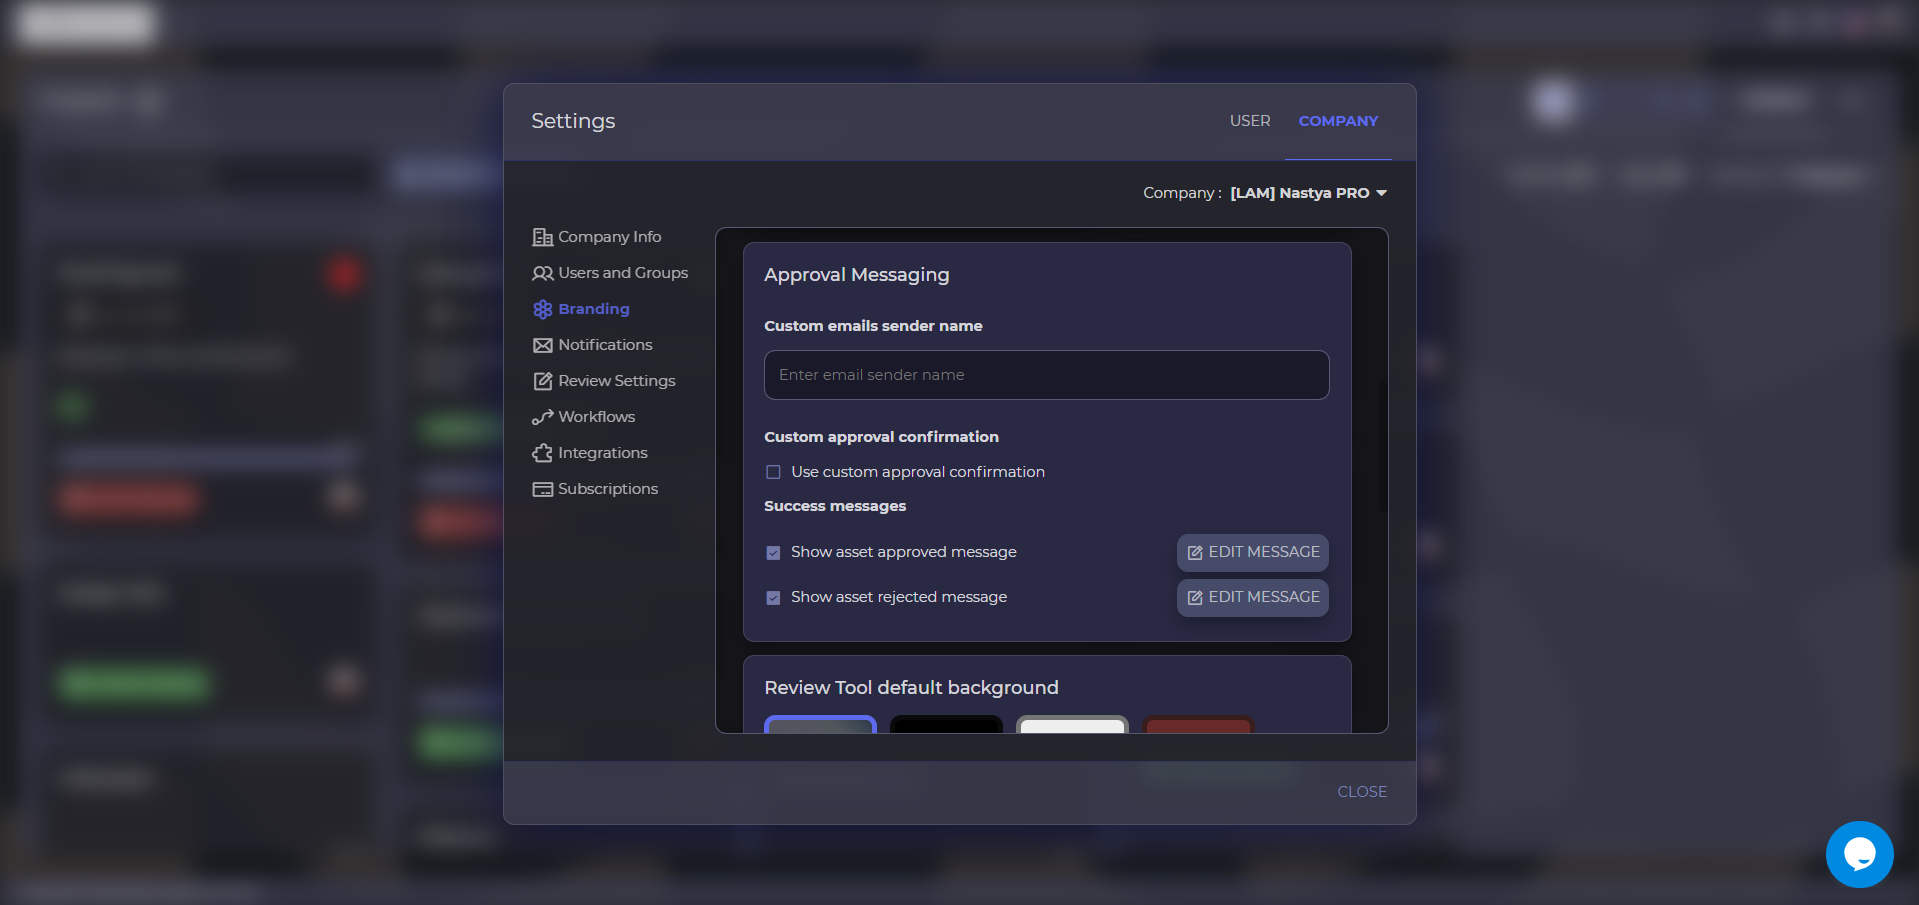
That’s where success messages come in.
Print Shop Owner:
How do you recommend using those?
Approval Studio Project Manager:
Use them to set expectations immediately after the action is completed. Keep them short, but make them reassuring. For example, after client approval:
“Your file has been approved and sent to production. We will ship your order within 3–5 business days.”
Or after requesting changes:
“Thank you. Your feedback has been sent to our design team. We’re already working on the updated version and will send you a new proof within 2 business days.”
This is not just a technical confirmation. It’s communication. You’re guiding the client through the process and removing uncertainty at every step. They know their action was received. They know what comes next. They have no reason to reach out through any other channel.

Print Shop Owner:
So in a way, every stage should answer the question: what do I do now, or what happens next?
Approval Studio Project Manager:
Exactly. That is the whole logic behind a successful setup.
At every point of the journey, the client should feel informed and comfortable. The invitation email explains what they need to do. The review interface is simple enough that they can do it without stress. The completion message explains what happens next.
If all three parts are configured properly, the experience stops feeling like “new software” and starts feeling like a smooth, natural part of doing business with you.
The Thread Running Through All of It: White-Label Everything
Print Shop Owner:
Is there anything that ties all of this together?
Approval Studio Project Manager:
Yes — and it’s something that runs through every step we’ve discussed: brand consistency.
The goal isn’t just to have a working approval process. It’s to make the entire experience feel like it’s part of your infrastructure. Your clients shouldn’t know what Approval Studio is. They should feel like they’re operating within your system, your brand, your world.
Approval Studio supports full white-labeling across every client-facing touchpoint:
- The invitation email — your logo, your colors, your sender name, your subject line
- The review tool itself — customized with your brand identity
- The success messages — written in your voice, with your timelines
A client can go through the entire approval journey — from receiving the email, to reviewing the proof, to reading the confirmation message — and at no point do they feel handed off to an external tool. It all feels like you.

The Two Questions to Ask Yourself
Print Shop Owner:
If you had to give a print shop owner one practical rule to follow while setting all of this up, what would it be?
Approval Studio Project Manager:
Every time you configure a client-facing part of the workflow, ask yourself two questions:
First: is it obvious what the client is supposed to do?
Second: is it obvious what happens after they do it?
If the answer to both is yes, you’re on the right track.
Final Takeaway
Getting clients to use an online review tool isn’t about forcing adoption. It’s about designing an experience where the review tool is simply the path of least resistance. Here’s the full framework:
- Custom invitation email — short, clear, written in plain language that even your parents could follow
- Branded HTML email design — your logo, your colors, your sender name, so it feels like it comes from you
- Simple Mode — three buttons only, no intimidation, matches exactly what the email described
- Success message — closes the loop, sets expectations, removes any reason to follow up elsewhere
When these elements are set up correctly, the proofing system stops feeling like a barrier and becomes a seamless part of the customer journey.
P.S.
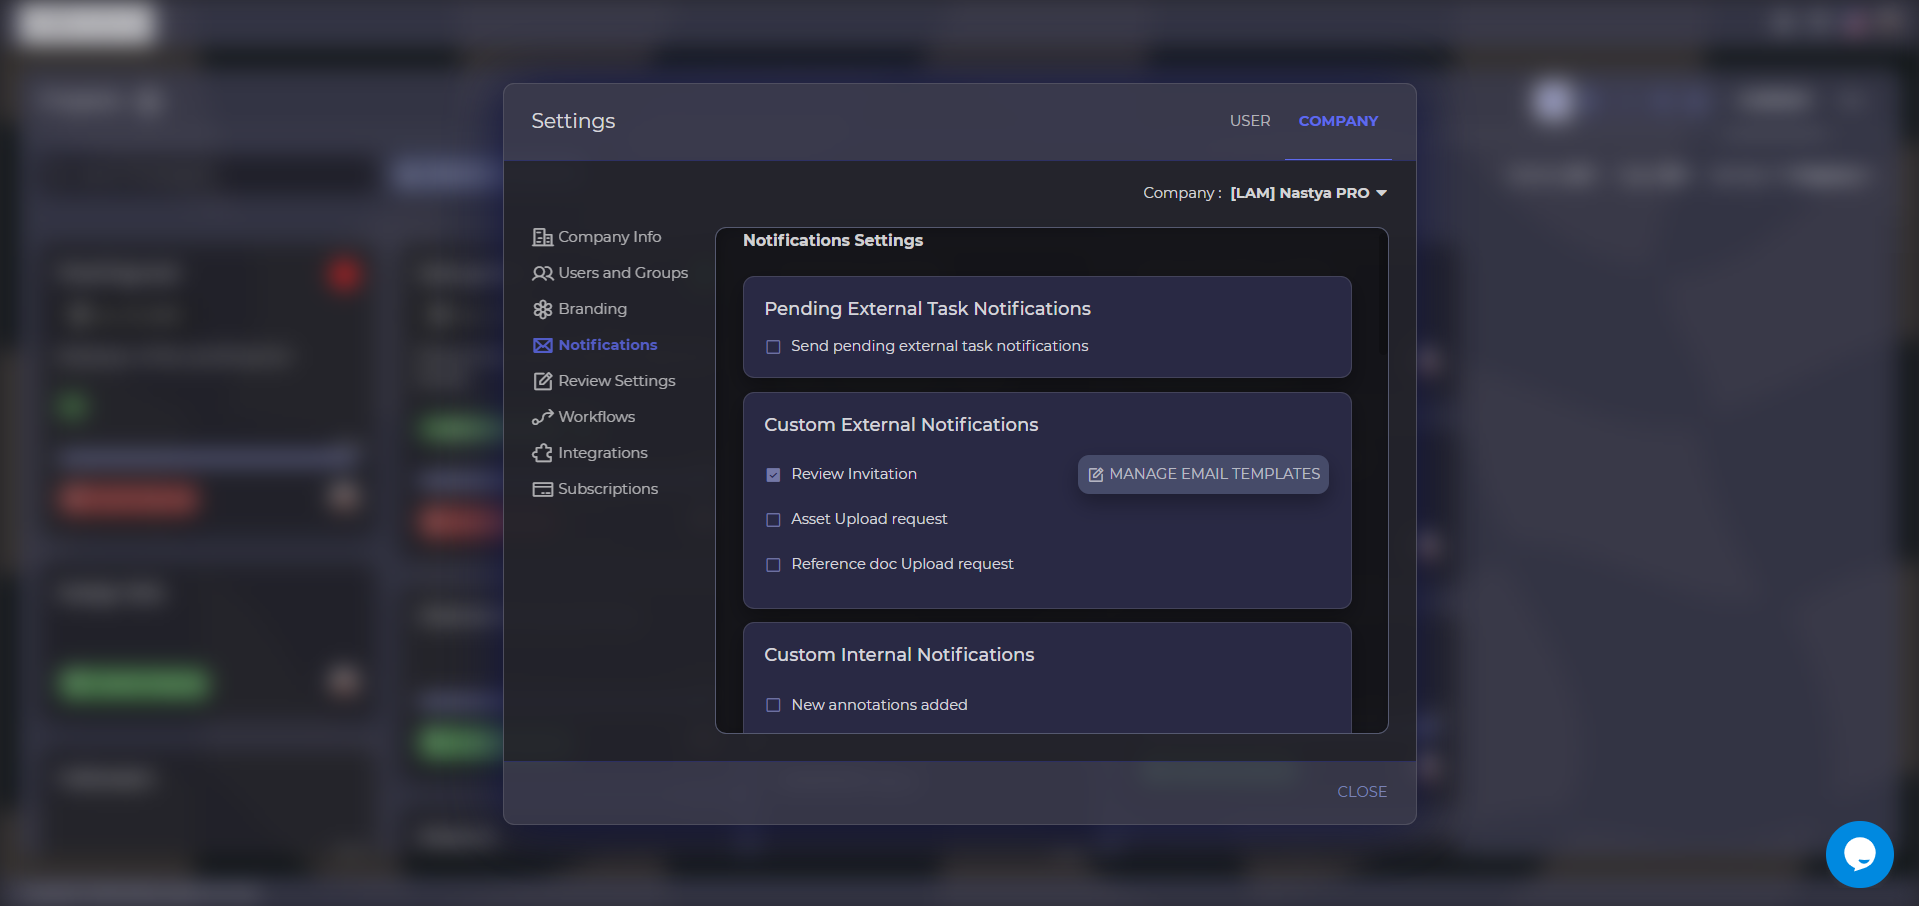
The actual conversation this article is based on ran about 40 minutes, during which I was walking the client through the setup in Approval Studio in real time. If you want to customize your email templates, go to Settings in the top-right corner, then Company Management, then Notifications — that’s where you’ll find the custom invitation template editor.
One important thing worth mentioning: everything discussed in this article is available to both Lite and Pro users. Customizing your emails, adjusting their look and feel, changing the sender name, using Simple Mode — none of that requires a Pro subscription. You can make the entire client-facing experience feel professional and branded regardless of your plan.
That said, the Lite and Pro versions do differ in meaningful ways. Lite is designed for smaller agencies and solo users whose primary need is uploading files and sending them for review. Pro is built for more advanced workflows — internal processes, recurring clients, more fields, and better support for larger teams.
This article was reconstructed from interview notes using an AI writing tool. All identifying information has been removed. The advice described reflects real implementation guidance provided during Approval Studio onboarding sessions.